Sunday, September 30, 2012

Kim Cooks Veg 4U Blog and MoFo

Hello! I have not yet figured out how to point this blog to the new blogs at www.kimcooksveg4u.blogspot.com

So please come over to the new home of my blog and become a follower there. This month is Vegan MoFo and I will be posting and giving away many cook books this month to my blog followers. I want to make sure those of you who have been following me here will follow me at the new blog and have lots of chances to win vegan cookbooks!!!

CLICK HERE TO  BE MAGICALLY TRANSPORTED TO THE NEW AND IMPROVED KIM COOKS VEG 4U BLOG


Saturday, September 15, 2012

Blogger Badness - Moved the Blog

Hey Guys. Hope you are having a great weekend so far. Blogger is having a seriously inconvenient issue with their DNS server. If you can see the blog, you are lucky. I have started a new and revamped blog at www.kimcooksveg4u.blogspot.com

Please join me over there for future posts!! Thanks for your understanding.

Saturday, September 8, 2012

Blog Tour: Fresh From the Vegan Slow Cooker by Robin Robertson

I'm excited to be doing my first blog tour! The kind folks at Harvard Common Press invited me to host a stop on the Blog Tour for Fresh From the Vegan Slow Cooker. Not only am I going to tell you about the book, you will also have a chance to win your very own copy. Details of the giveaway will be at the end of the post, so make sure to make it all the way to the end.


The first thing that struck me when I received my copy was the beautiful cover. Pictures speak more than a thousand words when it comes to food. The tacos on the front cover made me want to tear into the book. The only other pictures were on the back cover. I do wish there were more pictures because I totally love to drool over my cook books.

Robin Robertson is no stranger the cook book scene. She has written many wonderful vegetarian and vegan cook books. Her experience shows in her writing and organizational style. I've been cooking for decades. But I have to admit, my use of the slow cooker was pretty limited. Using the slow cooker was usually reserved for cooking beans. Robin teaches us that this was the first modern day slow cooker was developed specifically for cooking beans.

The first part of the book is full of tidbits and information on just about everything you need to know about using and enjoying your slow cooker. She offers advice on learning the timing for your specific cooker (which can vary greatly from brand to brand), when to add spices and other ingredients for the best results, the best way to thicken liquids and even a nice reference for vegan proteins used in slow cooking. If you don't want to spend a lot of time reading, she has included highlight boxes for quick reference. Even this old cooking dog learned some new tricks reading the first few sections of her book. Robin has a knack for taking simple pantry friendly ingredients and creating pleasing and hearty dishes.

Now I mentioned earlier that my repertoire for the slow cooker was pretty limited. After reviewing Fresh From the Vegan Slow Cooker, I have a completely different outlook on the uses of the slow cooker. I can now "bake" cakes when it is 110 degrees outside without heating up my kitchen (no minor deal in Arizona). If you have had bad luck making your own seitan, I highly recommend trying it in the slow cooker. It is virtually fool-proof. Robin provides a basic and easy recipe on page 136 of the book. If you are busy or just like the idea of walking in after a long day and having dinner ready to go, this book is for you.

I tried four recipes, including the seitan I mentioned above. I have my eye on many more. I really want to take a crack at making my own home made catsup or maybe the Slow-Cooker Pho. Oh so many possibilities! Below are a few of the recipes I tried out this week.

Holy Mole Red Bean Chili (pg. 82)


Chili is the quintessential crock pot dish in my opinion. They just go together like peas and carrots to me. This is probably why I made it first. I made it with the TVP option.  It had a nice spice, but seemed to be missing something. I think I would use veggie broth instead of water with this option to add more depth to the flavor. The seitan (that Robin recommended using) probably would have added an added dimension of flavor this could have used. But on a whole it was homey and good. I loved the hint of heat and smokiness the chipotle provided. It was very filling as well. Not midday snacks were needed after a lunch of Holy Mole!

Grandmom Gennaro's Minestre (pg. 54)


Fred picked this one out. He is still on his very low carb regime (for 2 more weeks). I am proud of his accomplishments, but am looking forward to being able to cook beans, tofu, tempeh and seitan for him freely again. This recipe is chock full of veggies! The ingredient list is short and simple. I was able to get everything into the crock pot in about 20 minutes before going to work (this included sautéing the onions and garlic). My crock pot took quite a bit longer to cook this than the 6-7 hour time stated in the recipe, but as Robin points out in her tips, all Crock Pots are not created equal. Mine is an oldie, so it probably needs more time to get up to speed (or temperature in this case).

Apple Walnut Cake (pg 244)


This cake was very pantry friendly and easy to make. The batter was very thick with nice warm spices. I cooked it in my 4 quart round crock pot. Sadly the crock pot cooked very unevenly. One side got a bit burnt and the other side was not cooked enough. This is a good way to test your crock pot for even cooking. That said, even with the uneven cooking the cake was not a total loss. It was still pretty tasty and fairly moist. I am guessing it would be really good in a properly working crock pot. Fred has requested I make this again when he can eat carbs. He loved the flavors. I thought it was so cool to be able to bake a cake without turning on the oven!

So now dear readers it is time to talk about how to score your very own copy! It's simple really. First, if you are not already a follower of the Veg-in-Training blog, please become one, because to win the book you must be a follower of the blog. Easy peasy right? Then make a comment on this post by midnight MST today, September 8th, 2012. Make the post slow cooker related if you can (optional). That's all you have to do to enter. The winner will be selected at random and announced here tomorrow. Please make sure to check back tomorrow to see if you have won! Good luck!

***Sorry to all of the international readers, this one is for US residents only.***

Congratulations to #27 Ilene Klang!!


Ilene, you are the winner of Robin Robertson's Fresh from the Vegan Slow Cooker. Please contact me at vegintraining at g mail dot com with your mailing address so the publisher can mail you your copy. Congratulations. You are going to love all of the wonderful recipes. Happy slow cooking!!

Wednesday, September 5, 2012

Hatch Melt on Marbled Rye

Last night as I worked to bag and freeze my green gold (aka Hatch Chiles), my Food Saver took a dump. Tonight I got home to a brand new Food Saver (thank you Fred). Fred gallantly headed first to  Costco then Bed Bath and Beyond to find a replacement. Not only did he score, but the very nice cashier gave him the 20% discount even though he forgot his coupon. Nice!! We also had a $50 gift card from some of our lovely friends. What could have been a kitchen tragedy actually turned out to be an "up with people" moment.

When I arrived home tonight, I knew I had a bit of a task ahead of me. It was time to bag up those delicious spicy chiles. Before digging in, I felt the urge for a sandwich. Not just any sandwich...no. I had scored some fabulous marbled rye yesterday. I love the stuff. This called for a melt. Not just your average every day melt. That would not do as I surveyed my giant pan of green chiles. This one would have to be a spicy melt. Here is how it went down...

First I thinly sliced some sweet onions. I tossed them into my iron skillet with a touch of oil and some Southwestern spices I had left over from who knows what. I then diced up a hatch chile and sauteed that along with the onions. Then some thin sliced seitan had to go in the pan and saute until just golden. The marble rye slices were sprayed with a bit of oil on one side. One slice went in oil side down. A couple of tablespoons of shredded Daiya went on to the bread. The seitan mixture was placed on top of that. Then I found just a smidge of some leftover sriracha vegannaise was dolloped on the stack. Next the last piece of bread. The melt was cooked until the bread was perfectly crunchy and golden brown. I don't have to tell you...well yes I do. The combination of the succulent filling, the ooey gooey Daiya, the spicy mayo and chiles perfectly complimented by the beautifully grilled bread was sheer joy! I love when bits of this and that turn into a great meal.


Monday, September 3, 2012

Hatch Chile Season is Upon Us

Every year it's the same thing. I get all tingly in the tummy and the tongue. My inner New Mexican comes to life and I anxiously await the coming of the Hatch Chiles like a child waiting for Santa. Well my friends, today was like Christmas morning. The Sprouts Markets in my neighborhood had the REAL Hatch Chiles from New Mexico for only $.69 per pound.

Fred heard a rumor that several of the local grocery stores were selling chiles grown in Mexico as "Hatch" chiles. Well anyone knows New Mexico Hatch chiles are grown from magical seeds in magical soil. The chiles we purchased were confirmed to be US, New Mexico grown. Score. Now for years I have been buying my chiles from a small market that roasted them for me, but sadly charging a rather outrageous price; a price I was more than willing to pay for my precious chiles. This year I bought them fresh. I had planned on roasting them on my grill when I remembered a random conversation I had with a co-worker/friend a while back. I remembered him saying he had a roaster. As luck would have it, he still had it and Fred picked it up from him this morning. What transpired was a fun night of roasting, enjoying a Mexican beer and some pool time. Oh yes, then there was the tacos!

Here they are waiting for me to throw them in the roaster.


Here is the roaster waiting for the chiles.


Perfecting my roasting technique. This needs to be an annual event/party!


Ready for packaging. We freeze 'em and use them all year long.


The first thing I decided to do with them? Tacos baby!!


Seitan Hatch Chile Tacos

Makes 8 tacos

Taco filling

1 tablespoon olive oil
1 medium onion, diced small
2 large hot green chiles (preferably Hatch) roasted, peeled and diced (approx 1/3 cup)
8 oz seitan, diced small
1 tablespoon medium chile powder
1 teaspoon smoked paprika
1/2 teaspoon Mexican oregano
1/2 teaspoon chipotle powder
1/2 teaspoon salt
1/4 teaspoon granulated garlic
1/4 teaspoon granulated onion
1 teaspoon agave nectar
1/2 cup water

8 crispy corn taco shells, prepared per package directions
1 cup shredded lettuce
1 large tomato, diced
1 large avocato, diced
Taco sauce or salsa of choice (I use Tapatio hot sauce)

In a 10 inch non-stick or iron skillet, heat oil over medium heat. Add onions and green chiles and saute until onions are soft, about 5 minutes. Add diced seitan and saute until browned, about 3-5 minutes. Add all dried spices and agave nectar. Stir until well combined and saute until just fragrant, about 1 minutes. Add water. Simmer until liquid is gone, about 5-7 minutes. Turn heat off.

While taco filling is cooking, bake taco shells according to package directions. Add about 2-3 tablespoons taco mixture in each taco shell. Top with shredded lettuce, diced tomatoes, diced avocados.   Sprinkle with hot sauce or salsa. You can also dollop some vegan sour cream on top if that's how you roll. 

Sunday, September 2, 2012

Free Cooking Class at Whole Foods 9/15/12

I'm super excited to announce a free cooking class and demonstration at Whole Foods Scottsdale.

This is my first time demonstrating at Whole Foods. They have a beautiful Wolf kitchen that is just waiting for me to whip up some vegan goodness. I'm ridiculously thrilled to have such a great opportunity.

The class will be held at 1pm on Saturday, September 15th. Space is limited to the first 50 people, so please reserve your spot soon. It's free, vegan and delicious, so I suspect it will fill up quickly. To reserve a spot, you can email Lisa at Whole foods sp.sct.marketing@wholefoods.com or you can sign up at the Sub Zero/Wolf Kitchen Counter at 7111 E. Mayo Blvd.

**There is one item missing from the menu. I will be making Sloppy Chipotle Joses as well.


Sunday, August 5, 2012

Book Review - Vegan Sandwiches Save the Day

First of all I must admit, I am a big fan of Tamasin Noyes author of Vegan Appetite blog and American Vegan Kitchen and have had the pleasure of testing for her on more than one occasion. I was excited when I learned it was a collaboration with Celine Steen of Have Cake Will Travel blog and co-author of 500 Vegan Recipes. I've enjoyed quite a few of her yummy recipes in the past. That said, I am also pretty straight forward in my opinions about cook books (even if I am partial to those writing them.).

I have been anticipating the release of Vegan Sandwiches Save the Day for quite some time. I got in on the very end of testing, so only tried a few of the recipes before the book came out. They were all very tasty and enticing, but I wondered if a sandwich book would really excite me as some other books have. When I opened the package I was first impressed with the photos on the cover. We eat with our eyes first. The photos on the cover and inside made my mouth water. Good sign.


Fred is still on his very restrictive diet, so I felt a tad bit guilty making sandwiches with all of their carby bread glory, but I had to do it in the name of research. There is such a great variety of flavors and styles of sandwiches to choose from, that the reader may have a hard time deciding where to start. I had no such problem, because there was one sandwich that I swear was created just for me: The Something Blackened This Way Comes (pg. 118). The name is a cute twist on the book by Ray Bradbury. I loved his books in high school, so I loved the name right off. I love anything blackened, so I knew this had to be the first one I made. 

OK, seriously, I expected this to be very flavorful. I expected to like it. I did not expect it to be the mouthgasm it was! I had frozen some of Tami's seitan cutlets a few weeks ago, so I had them on hand. This made prep a snap. It just hit me! This combo is reminiscent of a chicken sandwich we had at a restaurant I worked at years ago...but vegan and soooooooooooo much better. I loved the heat of the blackening spice and the sriracha spiked mayo. The cool cucumber/green tomato relish was just perfect with the spice and the creamy mayo. Served on a crispy ciabatta roll, it was ridiculously good. It was hard to stop at just one. 


While this is now my current fav, I also highly recommend the Two Tomato Tango (pg. 126) and the lunch box friendly Protein Happy Quinoa Wraps (pg. 74). 

I love the into where Celine and Tamasin make sure to mention that the recipes are just a starting point. they encourage the readers to play and modify to their tastes. For the ambitious there are recipes for home made breads, but options to use pre-made. The one criticism I do have about this book is the type face the publisher chose. For those of us whose eyes are getting "more mature", the type face is just a bit light and can be challenging to read at a distance. It's going to be hard to make my next selection, but the Ban Mi has piqued my interest. If you love hand held meals and fun variations on Americana and beyond, I highly recommend picking up a copy of Vegan Sandwiches Save the Day!

Sunday, July 22, 2012

Crispy Zucchini Havarti Purses with a Rustic Roma Tomato Sauce

Once upon a time, I worked at a little family owned joint in Illinois. The owner was this crazy, spastic guy from New York. His cooking skills weren't always the best, but every once in a while, he would come up with some really unique and successful ideas. One of the ideas he came up with was a unique way to make cheese sticks. He took rectangular chunks of mozzarella cheese, wrapped them in full sized wonton wrappers and threw those bad boys in the fryer. They were pretty amazing; creamy and gooey on the inside and super crispy on the outside. That was my inspiration for this creation. I opted to use mini wrappers, just to make myself feel less guilty, plus they are darn cute that way.

I've been hearing and seeing all sorts of yummy things about Daiya Havarti wedges. Happily I was able to find it at Whole Foods, Sprouts and Green New American Vegetarian. Admittedly, I'm not the biggest user of the faux cheeses, but have been pretty pleased in the past with Daiya's products in some of my dishes. I'm going to tell you right off, this might be my favorite flavor from Daiya Foods yet. I love the super creamy texture. The jalapenos give just a hint of zing that makes your mouth go, hmmmm dats good. It really melts well too! It's a little bit salty, so keep that in mind when you create your own dishes. You won't need to add much salt to them.


Below is the very simple recipe for these tasty little morsels with a complete pictorial below the recipe.

Crispy Zucchini Havarti Purses with a Rustic Roma Tomato Sauce

Makes 25 purses

25 mini wonton wrappers
1 cup shredded zucchini, un-peeled
1/2 wedge of Daiya Jalapeno Garlic Havarti
water for sealing purses
1 quart canola oil for frying
1 recipe Rustic Roma Tomato Sauce (recipe below)

Heat oil in 10 inch iron skillet or stainless steel pan (do not us a non-stick pan) to 350 degrees. Make sure oil is up to the proper temperature before adding purses.

Dampen a kitchen towel to cover the wonton wrappers with while you are preparing. This will prevent them from drying out. Working quickly with 5 wrappers at a time. Lay the wrappers out on your work surface. Place 1 1/2 - 2 teaspoons shredded zucchini in the center of each wonton wrapper. Then place 1/2 teaspoon havarti on top.

Put a bit of water in a small bowl. Using your finger, slightly wet all sides of the wonton wrapper.


Take two opposite corners and press them together. 

Take the two remaining corners and fold them into the center.


Gently pinch the straight edges together to complete forming the purses.


Here is what they should look like before they go for a swim in the oil.


Gently place the purses flat side down in the oil without crowding the pan. I recommend cooking only 5 at a time for that perfect golden color and crunchy texture. Fry for 2-3 minutes until the bottom sides are golden brown. Gently and carefully turn the purses over and cook for 2-3 more minutes until the other side is golden brown. Drain on paper towels. 


These are molten hot when they come out of the oil, so wait at least 5 minutes before eating them or you will think I am evil! Serve with warm Rustic Roma Tomato Sauce (recipe below).
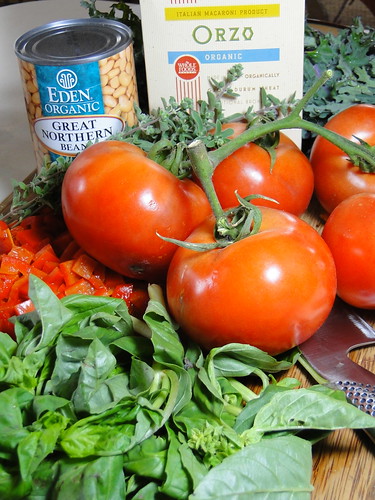
While gardens in many parts of the country are producing beautiful and plentiful harvests, our gardens here in AZ struggle with the intense heat. Our garden has all but pooped out. We have a few leeks and tiny jalapenos and that is about it. However, some of my friends are having better luck. Once again, my friend Scott brought me some goodies from his garden. This time he brought more zucchini and some awesome Roma tomatoes. The Romas were ripening very quickly. They were a bit too soft to eat straight up or even in a salad, so I decided to make a simple yet tasty rustic tomato sauce.

Check out those pretty tomatoes.


Rustic Roma Tomato Sauce

Makes 2 1/2 cups

2 teaspoons extra virgin olive oil
2 cloves garlic minced
1 small red onion, diced small (about 1/2 scant cup)
2 teaspoons dried oregano
1 teaspoon dried basil
1/2 teaspoon salt
1/4 teaspoon black pepper
1 tablespoon dry red wine
2 pounds organic Roma tomatoes cut lengthwise into 6 wedges
1/4 cup vegetable stock

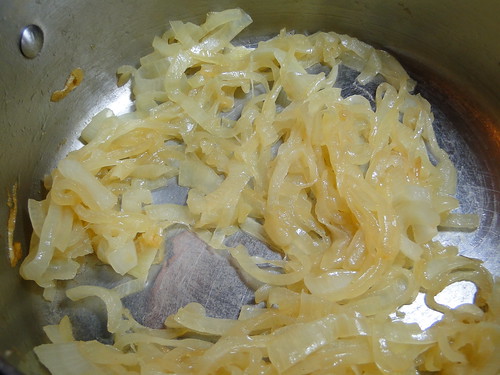
In a medium saucepan over medium heat, saute garlic and onions until onions are just starting to soften, about 5 minutes. Add oregano, basil, salt and black pepper. Saute for about 1 minute until herbs get fragrant. Add red wine and saute until liquid is absorbed, about 2 minutes. Add tomatoes and vegetable stock. Reduce heat to low and simmer for one hour. Sauce can be served immediately, but it is even better reheated! 

I couldn't help myself, I had to pay homage to Beady-eyed Bob, the crazy New Yorker. After we pigged out on the purses, I made a couple of mini cheeze sticks using just the Daiya. I rolled them egg roll style. Oh crazy rich awesomeness. I'm in love. Check out the melty awesomeness.


Saturday, July 7, 2012

National Heat Wave = NO OVEN!

I know that many parts of the country are experiencing a crazy heat wave this week. Arizonans are more used to it than others, but still. It might be a dry heat, but 113 is flipping HOT no matter how you slice it. This time of the year I don't like to add even one bit of heat to the house, but we do have to eat.

Fred and I are both trying to shed many unwanted pounds that have been hanging around for the past couple of years. His eating plan is pretty restrictive (that's an understatement) and not vegan friendly. I am doing my very best to support his efforts by shopping and making the veggie portion of his stuff. We've been eating lots of yummy tender asparagus, green beans, salads, etc. It is not super exciting stuff and certainly not blog material as it is a lot of the same stuff. This is why I have been again neglecting the poor blog.

Yesterday my good friend Scott mentioned that he had a crazy amount of zucchini he needed to find a home for. So today we met him for some coffee and great conversation. He not only brought some fantastic zucchini, he also brought some succulent roma tomatoes, yummy carrots, banana peppers and a leek. I have some plans for the zucchini, some of which will not fit into our diet plan. I'm going to (oh the horror) turn on the oven and bake some zucchini bread while Fred is out of the house.

Today I took advantage of Scott's tomatoes and carrots. I stopped at Whole Foods to pick up some organic kale. Man was I psyched to find big, beautiful bunches of green kale on sale for only $1.50. I had some Trader Joe's savory tofu in my fridge and some sweet onions from my garden. Armed with all kinds of yummy COLD ingredients, I went about whipping up a perfect summer lunch. This simple, quick, easy, filling and delicious salad is perfect for eating healthy on the fly and keeping the kitchen cool.


Massaged Kale Salad with Baked Savory Tofu


Makes 2 Big Salads

1 large bunch green kale, about 8 cups, washed and torn into bite sized pieces
1 tablespoon extra virgin olive oil
1 tablespoon white wine vinegar (can sub your favorite vinegar)
4 roma tomatoes, diced
1 large or 2 small carrots, sliced thin
1/2 small sweet white onion, thinly sliced
1-7 oz. package Trader Joe's Organic Baked Tofu (Savory Flavor)...feel free to sub any pre-cooked flavored tofu, diced
1/4 teaspoon garlic salt
fresh ground black pepper to taste

Place kale into a large non-reactive bowl. Toss with olive oil and vinegar. Gently massage mixture until the kale get slightly softened. Toss in tomatoes, sliced carrots, white onion and tofu. Sprinkle with garlic salt. Pepper to taste. Toss and serve immediately.

Wednesday, June 20, 2012

Beluga Lentil Bruschetta

Today is the official first day of summer. In the Phoenix area we start summer much earlier. It has been super hot here for weeks now. This time of the year the oven is avoided at all costs. I love cold foods from June to September, I swear. 

The other day, Fred mentioned that the pantry overfloweth. He thought I should think about using some of the dried treasures on the shelves. Quite some time ago I bought some Beluga lentils for a recipe. I only used half the bag, so there they were. Cute tiny little protein packed lentils. They are sometimes called vegan caviar. They cook up very quickly and are very mildly flavored. They stay pretty firm, which makes them perfect for cold dishes.

The garden is starting to struggle in the 110+ degree weather. Luckily we had one last gasp of yellow pear tomatoes and a giant zucchini, which I happily diced up for this yummy take on bruschetta. 


Beluga Lentil Bruschetta

Makes 12-20 pieces depending on the size of bread.

1/2 cup Beluga lentils, rinsed
1 1/4 cup water
1/3 cup yellow tomatoes, diced
1/2 cup grilled zucchini, diced small
1/2 cup roasted peppers, diced small
1 tablespoon fresh oregano, minced
1 tablespoon fresh basil, minced
1 teaspoon capers, roughly chopped
2 tablespoon sweet onions, minced
1/4 teaspoon black pepper
1/4 teaspoon salt
1 tablespoon lemon juice
2 tablespoons roughly chopped fresh parsley

Note: all herbs are measured after mincing/chopping.

In a non reactive bowl, mix all ingredients. Let marinate for at least 4 hours, preferably overnight. 

French baguette approx 1/2 inch slices. 
Olive oil to brush bread slices.
Lightly brush both sides of each slice of bread. Place in one layer on a cookie sheet. Either bake in a 350 oven or on the grill for about 4 minutes per side until bread is nicely browned.

Using a spoon top each slice of bread with lentil mixture. Serve immediately.

The lentil mixture also makes a great salad all on its own if you are trying to cut out the carbs. It's gluten free too!!!

Monday, May 28, 2012

Freddie Skettie

One of Fred's favorite things to brew up in the kitchen is spaghetti sauce. He never makes it the same twice and rarely if ever writes down the recipe. This time was no exception.

I do know that he put in tomato sauce, tomato paste, garlic, onions, fresh tomatoes from our friend Robert's garden, a huge amount of fresh herbs from our herb garden. In a spicy twist he added some vegan chorizo.

While I have absolutely no idea what proportions went into it, I do know that is was full of rich tomato flavor. The sauce was so hearty from the chorizo, I was filled up with just a small serving. Just look at all that goodness!!!


I encourage all of you to play around in your own kitchens. Part of the thing I find most joyful about cooking is just throwing in a little of this and a little of that and coming up with something new and delicious. I'm glad Fred agrees on occasion!

Wednesday, May 23, 2012

Kale Three Ways

What do you do with an over abundance of kale?


I just can't do it yet. I just can't leave my old blogging home. Part of it is nostalgia and my gratitute for you guys! The other part is that I really don't have a good command of the new website and quite frankly it looks boring. So I will stay here a little longer. I hope you stay with me!

Kale is the new beef right? Well I thought I'd totally kale out. This is my kind of Trio! I had three different types of kale, so I thought I'd try three different cooking methods.


Salad

Lacinto Kale (recipe still in the works). This salad shows great promise, but I wasn't totally happy with the dressing flavor combo, so I will keep working on this and post it another time.


Saute

1/2 onion, thinly sliced
3 teaspoons olive oil separated
1 1/2 teaspoons brown sugar
1 bunch Red Russian Kale, de-stemmed and ripped into bite sized pieces
2 teaspoon Braggs or low sodium soy or tamari
1 tablespoon fresh lemon juice
salt and pepper to taste

In an 8 or 10 inch non stick pan or iron skillet over medium low heat add 1 1/2 teaspoons olive oil. Add onions and sprinkle with brown sugar. Cook for about 20 minutes until onions are beautifully caramelized. Set aside in a small bowl. In the same skillet add remaining oil and kale. Saute kale for 5-7 minutes tossing frequently until the volume decreases by about 1/2. Add Braggs or low sodium soy and lemon juice. Add caramalized onions back to the pan. Saute for about 5 more minutes, until kale is soft but not mushy. Salt and pepper to taste.


Chips

1 large bunch curly green kale
1 tablespoon plus 1 teaspoon nutritional yeast
2 teaspoons Penzey's Northwoods seasoning or use your favorite low salt seasoning
1 scant tablespoon olive oil

Heat oven to 350.

Wash kale. De-stem and dry leaves. Rip into good sized pieces as they will shrink down quite a bit when baking. In a very large bowl place kale. Drizzle with olive oil and stir until well coated. Toss in nutritional yeast and Penzey's Northwoods Seasoning. Toss well making sure to get seasoning on all of the leaves.

On two cookie sheets, spread the seasoned kale leaves in a single layer. This is important or they will not crisp. Bake for 10 minutes. Turn leaves over and cook for 10 more minutes. It is a good idea to check the kale at about 7 minutes. They can crisp and burn quickly. The baking time can vary depending on the moisture content of the leaves.

Pull out of the oven. Let cool for 10 minutes or longer if you wish. Eat immediately. They will keep in an airtight container for about a day...if they last that long!

Friday, May 11, 2012

We're Moving...the Blog

It seems I never have time to sit down at the computer these days. I sorely miss the hours to peruse the internets and other vegan food blogs. I am working on slowly converting this blog over to my new digs at http://www.unconventionalevents.com/. I still need time to figure out the cpanel and other goodies. I am hoping I can figure out how to migrate my posts from here to that site.

UnConventional Events LLC is a little venture my friend and I are starting. We have a few dreams of what it will end up being down the road. For now, we are offering a limited number of cooking demonstrations and classes (vegan of course). We will also do the occasional catering gig when time permits. It is our hope to bring some yummy fare to our farmers' markets this fall. We both work full time, so we are starting slow and letting it morph into it's own fabulous being.

The website itself is still under construction, but the blog is up and running. I hope you will bookmark the new blog site and keep following. CLICK HERE to see the first post with pics on the new blog!! See you there!

Thursday, April 12, 2012

The Mediterranean Vegan Kitchen Dinner Night

Vine and Dine was canceled for this month. I had already found a couple of interesting vegan wines, so we decided to do our own Vine and Dine night. I am a multi-tasker, so along with vining, I pulled out another of my cook books that hasn't seen the light of my kitchen in what seems like years.

A long time ago, I checked out Donna Klein's The Mediterranean Vegan Kitchen from my local library. I don't remember what I made out of it at that time. But I do know that I spilled stuff on the book and ended up having to buy the library a new copy. So my copy had the library labels including the Dewey decimal code on it.

I have to say that this book collects a lot of dust. This is not a reflection of the quality of the recipes, because what I have made has been pretty good. I have been reflecting a lot on why some books get more use than others. What makes me pick up a cook book? What makes me want to make something out of it? What inspires me? These musings have become a more serious matter to me these days. I am getting close to having the number of recipes I feel good about for my own book. Now I need to figure out what will make readers want to really use my book when it is published.

Historically I have not been a reader of cook book introductions. I usually dig right in to the table of contents, recipes and of course the gorgeous pictures. Pictures really make a cook book jump out at me. I think this may be the reason this book gets neglected. For all of its rustic and solid recipes, it is just plain boring to look at. There is not one picture inside the cover. What is inside the cover is some very simple and healthy Mediterranean fare.

I made two dishes for our dinner the other night:

Gratin of Macaroni, Tomatoes, Basil and Olives (pg. 111) and Cauliflower with Capers in Herbed Vinaigrette (pg. 144). Fred is a big lover of pasta/tomato dishes of many types. That's why I chose the first dish. My good friend and fellow gardener, Robert, gave me this big beautiful head of cauliflower. See the pretty hint of purple in the florets?


For the gratin I used quinoa pasta, not so much for the gluten free aspect, but more because it is what was in my pantry. The bread crumbs took care of the gluten. Actually if you use GF breadcrumbs this could be a very nice addition to the GF kitchen. This dish is a case of the whole is better than the parts. It has very simple ingredients that come together in a very homey satisfying dish. The saltiness of the kalamata olives works nicely with the creaminess of the elbow macaroni and the beans. Tomato anything makes us happy usually, and they were a great addition to this dish. The basil pull it all together with it's fresh summery flavor. The breadcrumb gratin never really seemed to get that firm golden brown I love in a gratin. But perhaps I didn't let it cook long enough. The recipe made a lot. We will probably get 3 meals out of it for the two of us. 


We served it with the Cauliflower with Capers in Herbed Vinaigrette. I puffy heart this dish. It is loaded with fresh basil, parsley, chives and capers. The white wine vinegar pulls it all together. I let it sit for about an hour. Oh man was the flavor incredible. It was quite delish the next day as a cold dish as well. If you want a refreshing way to use up some cauliflower, I highly recommend this recipe.


My adorable el Fredo getting his Vine on.


We chose the Duckpond Chardonnay for our Vine tonight. Duckpond is one of Fred's favorite vegan wine makers. This particular selection has a lot of tropical fruit notes; pineapple, mango etc. It would be a nice selection for a caribbean or latin dish that has a bit of heat to it. Sadly, it was a mismatch for this meal. The mellow and more delicate spices in the food made the wine taste almost sweet and not in a good way. I think a Pinot Grigio, Pinot Gris or a nice dry Sauvinon Blanc would have been a better match in this case. 


Friday, March 30, 2012

Scott's Broccoli

What could be better than strolling through the farmers' market and picking out some beautifully local gown veggies? I'll tell you! Getting vegetables out of your (or your friend's) garden. While our garden is still trying to grow up and mature, some of my friends' gardens are producing crazy amounts of gorgeous vegetables.

My good friend and co-worker Scott and I chat often about our gardens. I love our garden chats and the advice he shares with me. His thumb is very green. He has been picking bunches and bunches of broccoli every day. He and his family can't eat it fast enough. He was sweet enough to share his mother load with me the other day. He brought in a super gigantic bag of tender, dark green, fresh broccoli. There was so much in fact, that both my office mate and I were each able to take home a healthy amount. Look at how pretty it is!!


I took a taste of it just raw and man was it tasty. I wanted to prepare it pretty simply so that the natural flavor of the broccoli would shine through. I also wanted to do some roasting. It's going to be hot here before we know it, and the oven will be the last tool I will want to use over the summer. Roasting also brings out the beautiful natural sugars in the vegetables; giving them a richer flavor than steaming or even sauteing. With these goals in mind, here is what developed:

Scott's Roasted Broccoli with Sun-dried Tomatoes and Garlic

Makes 4 servings (maybe 2 if you love broccoli as much as I do)

1 lb fresh broccoli
6 large sun dried tomatoes (in oil) thinly sliced
4 cloves garlic, minced
t tablespoon olive oil
1/4 teaspoon black pepper
1/4 teaspoon salt

Preheat oven to 400 degrees

Line rimmed baking sheet with parchment paper.

Wash broccoli. Some varieties of broccoli have very thin stems. This is the kind I had for tonight. This makes it very easy to prep. You just break it up into little trees, no stem trimming necessary. If the broccoli you have is the type with thick stems, slice off stem about 2-3 inches down from where the florets start separating from the stalk. Cut off individual florets and part of the remaining stem.

Place broccoli in a very large bowl. Add remaining ingredients and toss to coat completely. Spread in a single layer on the lined baking sheet. Roast for 12-15 minutes until broccoli is cooked but still a bit crunchy. Enjoy!!


Don't have friends with awesome gardens? This time of the year here in AZ, you should have no problem finding some great fresh broccoli at the farmers' markets. Click here for a nice list of local farmers' markets.

Monday, March 26, 2012

Lavosh Pizza

Last week I was shopping at Trader Joe's and came across some whole wheat lavosh. My original plan for the lavosh was to make a wrap with some type of white bean dip and lots of fresh veggies. I'm not sure why that hasn't happened yet. Maybe later this week for lunches. What did happen was lavosh pizza! The lavosh was a great crust. It was very thin and light. The edges got super crispy with the center being more tender.

Probably the biggest reason I went with pizza is that I had small amounts of a few ingredients left over from other recipes. Pizza is such a great way to use up small amounts of goodies that might otherwise get left behind. I had opened a jar of roasted red peppers for some soup I made this weekend. I had just a small amount of kalamata olives left over. Then I found a partial onion hanging out. Then there was some basic about to brown on me. I had a few creminis hiding out, but sadly my fridge did a Mr. Freeze on them. This recipe is very flexible, you can use your favorite toppings. Make sure not to over crowd the pizza so the crust can get nice and crispy.

If you haven't made it yet, Isa Chandra Moskowitz's Tofu Ricotta recipe is a fantastic substitute for the dairy version. This is often my go-to recipe for first time vegan diners. I served stuffed shells to my very meat eating extended family. They had no clue it was vegan. It's just incredible. As an added bonus, it is super easy to make. You can make the ricotta and the sauce ahead of time to make this a quick week night dinner. I always have a hard time finding a pizza sauce that I really like, but I think I may have created a winner tonight. I'll let you be the judge. It's very easy to make and has lots of yummy herby flavor. If you do try it, I'd love to hear what you think...leave me a comment.


Lavosh Pizza

Makes two pizzas

2 Lavosh
1 recipe pizza sauce (recpe below)
1/2 recipe Tofu Ricotta
1/4 red onion, very thinly sliced
1/2 cup sliced kalamata olives
2 roasted red peppers, sliced into thin strips
12 slow roasted halved cherry tomatoes
15-20 medium sized fresh basil leaves

Preheat oven to 425.

Place each lavosh on a cookie sheet (no need to oil). Spread with a thin layer of pizza sauce over the lavosh, leaving about 1 inch of the edge naked. Drop ricotta by the generous tablespoon about 1-2 inches apart. Using the back of the spoon, flatten ricotta. This will help it cook more evenly. Spread toppings evenly over the top. Bake for 10 minutes until lavosh is crisp on the edges and ricotta is hot. 

Slice and serve immediately. Serve with extra sauce on the side. 

Pizza Sauce

Makes approx 1 1/2 cups

2 teaspoons olive oil
3 cloves garlic, minced
2 teaspoons fresh oregano, chopped
1 teaspoon fresh thyme, chopped
pinch fresh rosemary
1/2 teaspoon fennel seeds, crushed
1/4 teaspoon black pepper
15 oz can organic tomato sauce

Sunday, March 25, 2012

White Bean and Orzo Soup with Fresh Italian Herbs

This past year, two of my very close girlfriends have been undergoing breast cancer treatment. As a survivor myself, I know how hard it is to ask for help. It is also difficult to keep up with all of the doctors' appointments, keep your energy up and take care of everyday life. It's hard to know what to do to help. One thing I know I can always do is make some healthy eats for them.

My friend who was just diagnosed has always been crazy about my soups, so much so, that she suggested I start my own line of healing soups. I thought that was pretty darn cute of her. But she is one to always find new business propositions. The challenge I have when creating recipes for her is that she is allergic to garlic. I adore garlic and rarely make anything savory without it. It is such a great flavoring agent and nothing is quite the same.

To offset the lack of garlic, I decided to ramp up the flavor with robust fresh herbs. This soup is loaded with nutrient dense vegetables. Great white Northern beans provide protein and additional fiber. The fresh tomatoes and roasted red peppers boost the vitamin content and add lovely color and flavor to the soup. Caramelized onions lend a hint of sweetness. This is a meal in a bowl. Serve with a nice crusty Italian bread and a simple green salad if you are very hungry.

Today at the farmers' market had some absolutely beautiful tomatoes (I love this time of year in AZ).


We have some wonderful red Russian kale coming out of the garden, so that became part of the mix.


I also grabbed some fresh thyme and oregano from our herb garden. I bought some fresh basil for another recipes that didn't happen this week, so I really had some great stuff to start with!


White Bean and Orzo Soup with Fresh Italian Herbs

1 tablespoon olive oil
1 large onion, halved and thinly sliced, approx. 3 cups
1 tablespoon brown sugar
3/4 teaspoon salt, divided
2 large tomatoes, 1/2 inch dice
3 roasted red peppers (I used jarred this time), 1/2 inch dice
1/3 cup tightly packed fresh Italian parsley, chopped fine
1/4 cup tightly packed fresh oregano leaves, chopped fine
1 teaspoon chopped fresh thyme leaves
1/2 fresh cracked pepper
6 cups vegetable stock
1 - 14.5 oz can Great Northern beans, liquid included
1/2 cup dry orzo
1 bunch kale chopped into small pieces
2 oz fresh basil leaves, chiffonade

In a 6 quart heavy bottomed saucepan or stockpot over medium low heat, add olive oil, onions, brown sugar and 1/4 teaspoon salt. Saute onions until they are just turning golden and slightly caramelized, stirring occasionally. This may take a little bit of time, but it is worth the wait to coax out the sweetness of the onions. This will give you time to chop your fresh herbs. 


Add diced tomatoes, roasted red peppers, oregano, thyme, black pepper and remaining 1/2 teaspoon salt. Raise heat to medium. Simmer until tomatoes just soften and liquid is almost gone, about 5-7 minutes.


Add vegetable stock and let simmer for 15 minutes. Add white beans, orzo and kale. Simmer for 15 more minutes until orzo and kale are both tender. Remove from heat and add basil. Let sit for 10 minutes. This will allow the basil to release it's flavor. Garnish with fresh basil leaves if desired.

Seitan au Poivre

Once upon a time, I was a culinary school student. My chefs were classically trained in the European, Escoffier ways of gastronomy. The methods we learned were steeped in centuries of tradition. They were hardly vegan or heart friendly; using plenty of high fat animal products. I must admit back in those days, I loved trying all the new and exciting techniques and favors I was being introduced to.

One of my ultimate favorite meat based dishes from back then was Steak au Poivre. This was a decadent dish made with beef tenderloin coated in black peppercorns. The filet was then seared, flamed with brandy, smothered with a rich demiglace and garnished with fresh chopped parsley. We cooked it table side at the school's student run restaurant. It was one of our most popular dishes. It was quite a show! One time, my partner and I were doing several orders at once. I loved the big flame, so I used a pretty healthy dose of brandy and promptly singed my bangs. Not an appetizing smell, that burnt hair. But it was pretty entertaining.


In this more compassionate version, you can still get the big show. I am going to suggest you leave out the flaming hair. The tenderloin is replaced by seitan steak. Panko crumbs are added to the peppercorns to add a hint of a crunchy texture. The peppercorns give a wonderful peppery bite and texture to the steaks. The rich velvety sauce makes you feel like you are in a five star restaurant. Steak au Poivre is traditionally served with potatoes. Tonight toasted Israeli cous cous with walnuts worked as a fun stand in. I had some chard in the fridge that I paid far too much for at Whole Foods. This was simply sauteed in olive oil with caramelized red onion, a touch of lemon juice, salt and pepper.

I have to admit, I did this from memory and I missed a couple of components that I realized after the fact, but it was still very tasty! In the classic version there is often an addition of mustard, and you certainly can add it if you please. In all honesty, it is excellent without it. I made extra sauce/gravy for potatoes later on.

Seitan au Poivre

4 servings sauce, 2 servings seitan steaks

For the Sauce 

2 tablespoons vegan butter
1 tablespoon olive oil
2 cloves garlic, minced
3 tablespoons shallots, minced
4 oz cremini mushrooms
1/2 teaspoon thyme
1/2 teaspoon oregano
1/2 teaspoon salt
3 tablespoons all purpose flour
2 cups strong vegetable broth
1 1/2 teaspoon kitchen bouquet (browning sauce)

In a 1 qt saucepan over medium heat, melt vegan butter. When butter is melted add olive oil, garlic and shallots. Saute until shallots are translucent. Add mushrooms and saute until they just soft and release their liquid, about 3-5 minutes. Stir in flour to coat. Cook for about 2-3 minutes further. Whisk in vegetable broth and kitchen bouquet until smooth. Simmer until sauce thickens, about 7-10 minutes. Remove from heat and set aside.

For Steaks

4 - 3 oz. seitan steaks (I used the Beefy Seitan recipe from American vegan kitchen)
1/2 cup unsweetened soy milk
1 teaspoon corn starch
3 tablespoons panko breadcrumbs
3 tablespoons very coarsely ground peppercorns
2 tablespoons olive oil
2 tablespoons brandy
chopped parsley for garnish

Set up breading station. Combine soy milk and corn starch in a shallow bowl. In a separate bowl mix the panko crumbs and peppercorns. Dip steaks, one at a time in soy milk mixture, making sure they are completely coated. Dredge in the panko mixture making sure the steaks are coated. Transfer to plate in a single layer.

Heat olive oil over medium high heat in 10 inch iron skillet or other heavy bottomed skillet (do not use non-stick coated pan here). The oil should be hot, but not smoking before adding the steaks. Add the steaks making sure they are not touching. Sear for about 3 minutes on each side. When the steaks are seared (browned and slightly crunchy), quickly add the brandy. Carefully flame the brandy using a stick lighter. When the flame goes out, add about 1 cup of the sauce. It will bubble a little bit from the hot pan.  Using a spatula, transfer to serving plate. Spoon sauce remaining in the pan over the steaks (and potatoes if serving). Garnish with fresh parsley.