Showing posts with label recipe. Show all posts

Friday, March 30, 2012

Scott's Broccoli

What could be better than strolling through the farmers' market and picking out some beautifully local gown veggies? I'll tell you! Getting vegetables out of your (or your friend's) garden. While our garden is still trying to grow up and mature, some of my friends' gardens are producing crazy amounts of gorgeous vegetables.

My good friend and co-worker Scott and I chat often about our gardens. I love our garden chats and the advice he shares with me. His thumb is very green. He has been picking bunches and bunches of broccoli every day. He and his family can't eat it fast enough. He was sweet enough to share his mother load with me the other day. He brought in a super gigantic bag of tender, dark green, fresh broccoli. There was so much in fact, that both my office mate and I were each able to take home a healthy amount. Look at how pretty it is!!


I took a taste of it just raw and man was it tasty. I wanted to prepare it pretty simply so that the natural flavor of the broccoli would shine through. I also wanted to do some roasting. It's going to be hot here before we know it, and the oven will be the last tool I will want to use over the summer. Roasting also brings out the beautiful natural sugars in the vegetables; giving them a richer flavor than steaming or even sauteing. With these goals in mind, here is what developed:

Scott's Roasted Broccoli with Sun-dried Tomatoes and Garlic

Makes 4 servings (maybe 2 if you love broccoli as much as I do)

1 lb fresh broccoli
6 large sun dried tomatoes (in oil) thinly sliced
4 cloves garlic, minced
t tablespoon olive oil
1/4 teaspoon black pepper
1/4 teaspoon salt

Preheat oven to 400 degrees

Line rimmed baking sheet with parchment paper.

Wash broccoli. Some varieties of broccoli have very thin stems. This is the kind I had for tonight. This makes it very easy to prep. You just break it up into little trees, no stem trimming necessary. If the broccoli you have is the type with thick stems, slice off stem about 2-3 inches down from where the florets start separating from the stalk. Cut off individual florets and part of the remaining stem.

Place broccoli in a very large bowl. Add remaining ingredients and toss to coat completely. Spread in a single layer on the lined baking sheet. Roast for 12-15 minutes until broccoli is cooked but still a bit crunchy. Enjoy!!


Don't have friends with awesome gardens? This time of the year here in AZ, you should have no problem finding some great fresh broccoli at the farmers' markets. Click here for a nice list of local farmers' markets.

Monday, March 26, 2012

Lavosh Pizza

Last week I was shopping at Trader Joe's and came across some whole wheat lavosh. My original plan for the lavosh was to make a wrap with some type of white bean dip and lots of fresh veggies. I'm not sure why that hasn't happened yet. Maybe later this week for lunches. What did happen was lavosh pizza! The lavosh was a great crust. It was very thin and light. The edges got super crispy with the center being more tender.

Probably the biggest reason I went with pizza is that I had small amounts of a few ingredients left over from other recipes. Pizza is such a great way to use up small amounts of goodies that might otherwise get left behind. I had opened a jar of roasted red peppers for some soup I made this weekend. I had just a small amount of kalamata olives left over. Then I found a partial onion hanging out. Then there was some basic about to brown on me. I had a few creminis hiding out, but sadly my fridge did a Mr. Freeze on them. This recipe is very flexible, you can use your favorite toppings. Make sure not to over crowd the pizza so the crust can get nice and crispy.

If you haven't made it yet, Isa Chandra Moskowitz's Tofu Ricotta recipe is a fantastic substitute for the dairy version. This is often my go-to recipe for first time vegan diners. I served stuffed shells to my very meat eating extended family. They had no clue it was vegan. It's just incredible. As an added bonus, it is super easy to make. You can make the ricotta and the sauce ahead of time to make this a quick week night dinner. I always have a hard time finding a pizza sauce that I really like, but I think I may have created a winner tonight. I'll let you be the judge. It's very easy to make and has lots of yummy herby flavor. If you do try it, I'd love to hear what you think...leave me a comment.


Lavosh Pizza

Makes two pizzas

2 Lavosh
1 recipe pizza sauce (recpe below)
1/2 recipe Tofu Ricotta
1/4 red onion, very thinly sliced
1/2 cup sliced kalamata olives
2 roasted red peppers, sliced into thin strips
12 slow roasted halved cherry tomatoes
15-20 medium sized fresh basil leaves

Preheat oven to 425.

Place each lavosh on a cookie sheet (no need to oil). Spread with a thin layer of pizza sauce over the lavosh, leaving about 1 inch of the edge naked. Drop ricotta by the generous tablespoon about 1-2 inches apart. Using the back of the spoon, flatten ricotta. This will help it cook more evenly. Spread toppings evenly over the top. Bake for 10 minutes until lavosh is crisp on the edges and ricotta is hot. 

Slice and serve immediately. Serve with extra sauce on the side. 

Pizza Sauce

Makes approx 1 1/2 cups

2 teaspoons olive oil
3 cloves garlic, minced
2 teaspoons fresh oregano, chopped
1 teaspoon fresh thyme, chopped
pinch fresh rosemary
1/2 teaspoon fennel seeds, crushed
1/4 teaspoon black pepper
15 oz can organic tomato sauce

Sunday, March 25, 2012

White Bean and Orzo Soup with Fresh Italian Herbs

This past year, two of my very close girlfriends have been undergoing breast cancer treatment. As a survivor myself, I know how hard it is to ask for help. It is also difficult to keep up with all of the doctors' appointments, keep your energy up and take care of everyday life. It's hard to know what to do to help. One thing I know I can always do is make some healthy eats for them.

My friend who was just diagnosed has always been crazy about my soups, so much so, that she suggested I start my own line of healing soups. I thought that was pretty darn cute of her. But she is one to always find new business propositions. The challenge I have when creating recipes for her is that she is allergic to garlic. I adore garlic and rarely make anything savory without it. It is such a great flavoring agent and nothing is quite the same.

To offset the lack of garlic, I decided to ramp up the flavor with robust fresh herbs. This soup is loaded with nutrient dense vegetables. Great white Northern beans provide protein and additional fiber. The fresh tomatoes and roasted red peppers boost the vitamin content and add lovely color and flavor to the soup. Caramelized onions lend a hint of sweetness. This is a meal in a bowl. Serve with a nice crusty Italian bread and a simple green salad if you are very hungry.

Today at the farmers' market had some absolutely beautiful tomatoes (I love this time of year in AZ).


We have some wonderful red Russian kale coming out of the garden, so that became part of the mix.


I also grabbed some fresh thyme and oregano from our herb garden. I bought some fresh basil for another recipes that didn't happen this week, so I really had some great stuff to start with!


White Bean and Orzo Soup with Fresh Italian Herbs

1 tablespoon olive oil
1 large onion, halved and thinly sliced, approx. 3 cups
1 tablespoon brown sugar
3/4 teaspoon salt, divided
2 large tomatoes, 1/2 inch dice
3 roasted red peppers (I used jarred this time), 1/2 inch dice
1/3 cup tightly packed fresh Italian parsley, chopped fine
1/4 cup tightly packed fresh oregano leaves, chopped fine
1 teaspoon chopped fresh thyme leaves
1/2 fresh cracked pepper
6 cups vegetable stock
1 - 14.5 oz can Great Northern beans, liquid included
1/2 cup dry orzo
1 bunch kale chopped into small pieces
2 oz fresh basil leaves, chiffonade

In a 6 quart heavy bottomed saucepan or stockpot over medium low heat, add olive oil, onions, brown sugar and 1/4 teaspoon salt. Saute onions until they are just turning golden and slightly caramelized, stirring occasionally. This may take a little bit of time, but it is worth the wait to coax out the sweetness of the onions. This will give you time to chop your fresh herbs. 


Add diced tomatoes, roasted red peppers, oregano, thyme, black pepper and remaining 1/2 teaspoon salt. Raise heat to medium. Simmer until tomatoes just soften and liquid is almost gone, about 5-7 minutes.


Add vegetable stock and let simmer for 15 minutes. Add white beans, orzo and kale. Simmer for 15 more minutes until orzo and kale are both tender. Remove from heat and add basil. Let sit for 10 minutes. This will allow the basil to release it's flavor. Garnish with fresh basil leaves if desired.

Seitan au Poivre

Once upon a time, I was a culinary school student. My chefs were classically trained in the European, Escoffier ways of gastronomy. The methods we learned were steeped in centuries of tradition. They were hardly vegan or heart friendly; using plenty of high fat animal products. I must admit back in those days, I loved trying all the new and exciting techniques and favors I was being introduced to.

One of my ultimate favorite meat based dishes from back then was Steak au Poivre. This was a decadent dish made with beef tenderloin coated in black peppercorns. The filet was then seared, flamed with brandy, smothered with a rich demiglace and garnished with fresh chopped parsley. We cooked it table side at the school's student run restaurant. It was one of our most popular dishes. It was quite a show! One time, my partner and I were doing several orders at once. I loved the big flame, so I used a pretty healthy dose of brandy and promptly singed my bangs. Not an appetizing smell, that burnt hair. But it was pretty entertaining.


In this more compassionate version, you can still get the big show. I am going to suggest you leave out the flaming hair. The tenderloin is replaced by seitan steak. Panko crumbs are added to the peppercorns to add a hint of a crunchy texture. The peppercorns give a wonderful peppery bite and texture to the steaks. The rich velvety sauce makes you feel like you are in a five star restaurant. Steak au Poivre is traditionally served with potatoes. Tonight toasted Israeli cous cous with walnuts worked as a fun stand in. I had some chard in the fridge that I paid far too much for at Whole Foods. This was simply sauteed in olive oil with caramelized red onion, a touch of lemon juice, salt and pepper.

I have to admit, I did this from memory and I missed a couple of components that I realized after the fact, but it was still very tasty! In the classic version there is often an addition of mustard, and you certainly can add it if you please. In all honesty, it is excellent without it. I made extra sauce/gravy for potatoes later on.

Seitan au Poivre

4 servings sauce, 2 servings seitan steaks

For the Sauce 

2 tablespoons vegan butter
1 tablespoon olive oil
2 cloves garlic, minced
3 tablespoons shallots, minced
4 oz cremini mushrooms
1/2 teaspoon thyme
1/2 teaspoon oregano
1/2 teaspoon salt
3 tablespoons all purpose flour
2 cups strong vegetable broth
1 1/2 teaspoon kitchen bouquet (browning sauce)

In a 1 qt saucepan over medium heat, melt vegan butter. When butter is melted add olive oil, garlic and shallots. Saute until shallots are translucent. Add mushrooms and saute until they just soft and release their liquid, about 3-5 minutes. Stir in flour to coat. Cook for about 2-3 minutes further. Whisk in vegetable broth and kitchen bouquet until smooth. Simmer until sauce thickens, about 7-10 minutes. Remove from heat and set aside.

For Steaks

4 - 3 oz. seitan steaks (I used the Beefy Seitan recipe from American vegan kitchen)
1/2 cup unsweetened soy milk
1 teaspoon corn starch
3 tablespoons panko breadcrumbs
3 tablespoons very coarsely ground peppercorns
2 tablespoons olive oil
2 tablespoons brandy
chopped parsley for garnish

Set up breading station. Combine soy milk and corn starch in a shallow bowl. In a separate bowl mix the panko crumbs and peppercorns. Dip steaks, one at a time in soy milk mixture, making sure they are completely coated. Dredge in the panko mixture making sure the steaks are coated. Transfer to plate in a single layer.

Heat olive oil over medium high heat in 10 inch iron skillet or other heavy bottomed skillet (do not use non-stick coated pan here). The oil should be hot, but not smoking before adding the steaks. Add the steaks making sure they are not touching. Sear for about 3 minutes on each side. When the steaks are seared (browned and slightly crunchy), quickly add the brandy. Carefully flame the brandy using a stick lighter. When the flame goes out, add about 1 cup of the sauce. It will bubble a little bit from the hot pan.  Using a spatula, transfer to serving plate. Spoon sauce remaining in the pan over the steaks (and potatoes if serving). Garnish with fresh parsley.

Thursday, March 15, 2012

Sometimes Simple is Best


If you've been following the blog for a while or you know me personally, you are probably aware that my recipes often contain a load of ingredients. In my defense, they are often just spices that (hopefully) you have on hand. Last night I was in the mood for simple, wholesome food with very few ingredients; something that I could whip up without having to depend on my great dried herb arsenal. 

The herb barrel is doing quite well now. Those fresh herbs were calling out to me to be used. In addition, the fridge was stuffed full of produce quickly coming to the end of its prime. I bought lots of fresh goodies at the farmers' market the week before with good intentions of cooking up a storm. As my busy schedule would have it, cooking was not to be on the agenda after all. 

After a quick trip to cut the herbs and sort out the mess in the fridge I found the makings for a lovely, fairly light dinner. The smells of roasting rosemary, oregano and garlic were heaven to the nose. I don't know if it is even fair to call these recipes, but I will anyway!

Greek Lemon Tofu

4 servings

1 - 12 oz package extra firm tofu, pressed and cut into 8 triangles
1/4 cup fresh lemon juice
2 tablespoons olive oil
2 tablespoon vegetable stock
1 tablespoon fresh chopped oregano, measured after chopping
2 cloves garlic, minced
1/2 teaspoon or so lemon pepper seasoning
2 teaspoons + 2 tablespoons panko bread crumbs
spray olive oil

In an 8 x 8 baking dish stir together lemon juice, olive oil, vegetable stock and garlic until well combined. Place sliced tofu in a single layer in pan. Marinate for at least two hours, preferably overnight, turning about half way through marinating time. Remove tofu from pan and reserve marinade. 

Preheat oven to 350. 

Lightly oil parchment lined baking dish (you can use the same dish you used for the marinade, rinsing first). Place tofu in single layer in baking dish and sprinkle with lemon pepper seasoning. Brush or drizzle with reserved marinade. Bake for 20 minutes. Turn over and sprinkle other side with lemon pepper seasoning. Brush or drizzle lightly with reserved marinade. Sprinkle about 1 teaspoon panko bread crumbs. Spray generously with spray olive oil or canola oil. Bake for another 20 minutes until panko is nicely browned. Remove from pan with spatula. Serve immediately with Rosemary Roasted Red Potatoes (recipe below).

Rosemary Roasted Red Potatoes

Make 4 servings

2 pounds small red potatoes, with peels, quartered
3 sprigs fresh rosemary (approx. 2 tablespoons), removed from stem
3 large cloves garlic, crushed
2 tablespoons olive oil
Salt and pepper to taste

Preheat oven to 400.

In a large saucepan, add enough water to cover potatoes. Over medium heat bring water and potatoes to bowl. Reduce heat to low to simmer until just barely fork soft, about 15 minutes. Drain well. 

Line a rimmed baking sheet with parchment paper. Toss together all ingredients. Salt and pepper to taste. Place in the oven and roast for 25 minutes. Turn the potatoes and roast for 20-25 more minutes until potatoes are starting to turn golden brown. Remove from oven and serve immediately.

Thursday, February 9, 2012

Robin Robertson's 1000 Vegan Recipes - Curried Butternut and Red Lentil Soup with Chard

This week I was craving colorful anti-oxidant full healthy chow. I had gotten some beautiful chard from Horny Toad Farms this week and some sweet little butternut squash. I rifled through my ever expanding cookbook selection and grabbed 1000 Vegan Recipes by Robin Robertson. I know with a volume that big, I was sure to find something perfect for what I was craving. It was a good call.

I love Robin's books and this one is not exception. If you are not a cook book junkie like me, this is a great book to have as it has such a huge variety of recipes. She is the queen of easy and quick vegan deliciousness. The only down side to this book is there aren't any pictures. I haven't made a lot from this one yet, but after this delicious soup, I am wondering why?

Grab a spoon and prepare to feel the glow of colorful veggies and deliciousness.


Curried Butternut and Red Lentil Soup with Chard
from 1000 Vegan Recipes by Robin Robertson
John Wiley & Sons, Inc. (publisher)

1 tablespoon olive oil
1 medium onion, chopped
1 medium butternut squash, peeled and diced
1 garlic clove, minced
1 tablespoon minced fresh ginger
1 tablespoon hot or mild curry powder
1 - 14.5 oz can crushed tomatoes (I used fire roasted)
1 cup red lentils, picked over, rinsed, and drained
5 cups vegetable broth
salt and freshly ground black pepper
3 cups chopped stemmed Swiss chard (I used about 5 cups)

In a large soup pot, heal the oil over medium heat. Add the onion, squash and garlic. Cover and cook until softened, about 10 minutes.

Stir in the ginger and curry powder, then add the tomatoes, lentils, broth and salt and pepper to taste. Bring to a boil, then reduce heat to low and simmer, uncovered, until the lentils and vegetables are tender, stirring occasionally, about 45 minutes.

About 15 minutes before serving, stir in the chard. Taste, adjusting seasonings if necessary, and serve.

Saturday, February 4, 2012

Agave Sweetened Pickled Beets

I got some beautiful Chioggia beets from Stella at Horny Toad Farms a couple of weeks ago. They are just gorgeous. Look at those rings of goodness. These are pictured right after steaming.

In hind sight I should have left well enough alone, but I had it in my head that I wanted to make Fred some pickled beets. He buys lots of pickled goodies from the farmers' market. It's good stuff, but holy wow is it expensive. So I thought if I could come up with a good recipe, I could save him some hard earned cash.

This recipe is not one to be saved in the pantry as it is not pressure cooked. It is a refrigerated version that will keep for a couple of weeks in the fridge. I decided to try agave nectar to lower the glycemic hit a bit. Fred gave them his seal of approval...with a caveat that they are a little vinegary. Just warning you ahead of time, these are not sticky sweet beets. I used the Chioggia in the first batch and beautiful rings faded, so I recommend using single colored beets for pickling and save these beauties for steaming.


Agave Sweetened Pickled Beets

Makes about 1 quart

1 1/4 pounds beets, about 3-4 cups after slicing
2 large shallots, halved and sliced thin
1 cup white wine vinegar
1 cup cider vinegar
1 cup water
2/3 cup agave nectar
2 cinnamon sticks

Wash beets. Cut off leaves if still intact. In a steamer, steam beets until soft enough to pierce with a fork easily. Let cool until cool enough to handle. Peel beets and cut into 1/4 inch slices. Place sliced beets, sliced shallots and cinnamon sticks in cleaned and sanitized quart canning jar. 

In a saucepan combine vinegars, water and agave nectar. Bring to a boil. Pour liquid into jar. While it is still hot, seal with new clean and sanitized canning lid. Let cool to room temperature. Place in fridge. Let sit for at least three days. They should keep for a few weeks.

Monday, January 23, 2012

Garlic Fest in My Soup

Man did the farmers market have such a nice variety of goodies this week. The greens were out of this world. I had a huge bunch of kale that was screaming to be used. I thought about kale chips, I though about just sauteing them up. But I just wasn't feeling it. I love the cooler days of winter...soup weather, so that's what I decided to do.

I wanted a lot of flavor and not a lot of ingredients. Something really tasty and special but not overly complicated. Something anyone could make on a weeknight. Now I have to tell you no vampires will come near you after this one! My house is still full of the beautiful smell of garlic. I had some leftover butternut squash and the kale both from Horny Toad Farms. The earthy mushrooms and thyme combine with garlic and marsala give this soup a very special flavor.


Garlic Wonder Soup

Makes 6 servings

1 tablespoon olive oil
1 small white onion, roughly chopped
10 large cloves garlic, minced
2 teaspoons dried thyme
1/2 teaspoon salt
1/2 teaspoon black pepper
1/3 cup marsala wine (not sweet)
1 cup butternut squash, 1/2 inch dice
4 cups vegetable broth
1 bay leaf
4 oz cremini mushrooms, sliced
1/2 pound kale, ribs removed chopped, about 2 1/2 cups after ribs are removed
1 can navy beans with liquid

In a 4 quart heavy bottomed pot over medium heat, saute onion, until slightly golden, about 7 minutes. Add garlic and saute until fragrant, about 30 seconds. Stir in thyme, black pepper and salt and saute for another minute. Pour in marsala wine to deglaze pan, scraping any bits off the bottom of the pot. Saute for another minute or two until liquid is reduced by half. Reduce heat to low. Add cubed butternut squash and saute until it is just starting to slightly caramelize, about 3-5 minutes. Add vegetable broth and bay leaf. Increase heat and bring to a boil. Turn heat back down to medium low and simmer for about 10 minutes, or until butternut squash is al dente. Add mushrooms and simmer for 5-10 more minute until mushrooms and butternut squash are soft. Add kale and simmer for about 5 more minutes. Add navy beans with their liquid and simmer until they are heated through. Salt and pepper to taste. Serve with crusty bread and feel the wonder! Oh yes and don't forget to brush your teeth after :)

Sunday, January 22, 2012

Farmers Market Featured Ingredient - Tatsoi

A couple of weeks ago Farmer Stella from Horny Toad Farms introduced me to a green I had never seen before: Tatsoi. It may just show up in the Horny Toad farm CSA this week. If you are looking for a good way to use this interesting green, keep reading.

When Fred asked me what it was I told him that it reminds me of a cross between spinach and bok choy. Funny, when I looked it up on wikipedia it said it was also called spinach mustard, spoon mustard or rosette bok choy. So I wasn't too far off. This lusciously dark green sautes up like a dream. The stems stay slightly crunchy which is beautiful with soba or udon noodles. They have just the slightest mustard-like bite to them. Quite lovely in the recipe below.


Miso Ginger Grilled Tempeh with Tatsoi and Soba Saute

1-8 oz package tempeh
1/2 cup water
1 tablespoon red miso
2 tablespoons soy sauce
1 tablespoon minced fresh ginger
1 large clove garlic, minced
1 tablespoon toasted sesame oil

6 oz. soba noodles

1 tablespoon, toasted sesame oil
1 tablespoon fresh ginger, minced
3 large cloves garlic, minced
2 tablespoons soy sauce
1 tablespoon dry sake or mirin
1 teaspoon sriracha sauce
1/4 teaspoon five spice powder
3 bunches tatsoi roughly chopped, about 10 cups

Cut tempeh into 8 triangles 1/4" thick. Steam tempeh for 10 minute. While tempeh is steaming in 8 x 8 baking dish mix water, miso, soy sauce, ginger, garlic and sesame oil until completely mix. Marinate for at least two hours, preferably overnight.

Cook noodles according to package directions. Drain and rinse with cold water to stop cooking and set aside.

To cook tempeh:

Heat a grill pan or grill to approx. 350 degrees. When grill/pan is hot, grill tempeh for about 3-4 minutes per side, brushing each side with marinade. Tempeh should have nice grill marks and be heated through. 

While tempeh is cooking prepare the greens.

In a large saute pan over medium high heat, saute ginger and garlic in sesame oil for about 30 seconds until fragrant. Deglaze pan with sake/mirin stirring to remove stuck on bits. Add soy sauce, five spice powder and stems of tatsoi. Saute for about 2 minutes. Add remaining tatsoi and saute for about 3-5 more minute until greens are tender and just slightly crisp. Toss in soba or udon noodles and heat through. 

Divide noodle mixture evenly among 4 plates. Top with two pieces of grilled tempeh. Serve immediately. 

Wednesday, January 11, 2012

Winter Vegetable Wonderland

Root vegetables. They spend their growing days in the dark like a bear hibernating for the winter. That is until the day they are released from their earthy cave by the scruff of their stems. After a good scrubbing, they are ready for some love and oven time.

There has been a mother load of root vegetables at the farmers market for the past few weeks. It's so that time of the year. I grabbed some beautiful, bulbous, colorful magnificence in the form of golden and red beets, sweet potatoes, turnips and parsnips (ok the last two aren't so colorful, but whatevs).

To me root vegetables scream "roast me!". I love to roast them until they are golden and caramelized giving them that earthy sweetness and nice slightly chewy texture. Oh man, that is winter cooking at it's finest.

We had lots of people coming for Thanksmas and I thought a root vegetable roast would be a fabulous way to show them how much I love them.


Root Vegetable and Fennel Roast

2 lbs golden beets
2 lbs red beets
3/4 pounds turnips
1/2 lb parsnips
1 lb orange sweet potatoes or garnet yams
1 bulb fennel, thinly sliced, about 1 cup
1 1/2 teaspoons thyme
1 teaspoon salt
1/2 teaspoon black pepper
1/2 teaspoon tarragon
6 cloves garlic, one minced, 5 thinly sliced
1 tablespoon olive oil

Preheat oven to 350.

Peel beets, turnips, parsnips and sweet potatoes. Cut into 1/2" dice. In a very large 1 inch or deeper pan, toss all ingredients together.

In a very large baking pan lined with parchment toss all ingredients together. Roast uncovered for about 40 to 50 minutes turning once or twice until softened and caramelized. Salt and pepper to taste.

Sunday, January 1, 2012

Happy 2012!!!

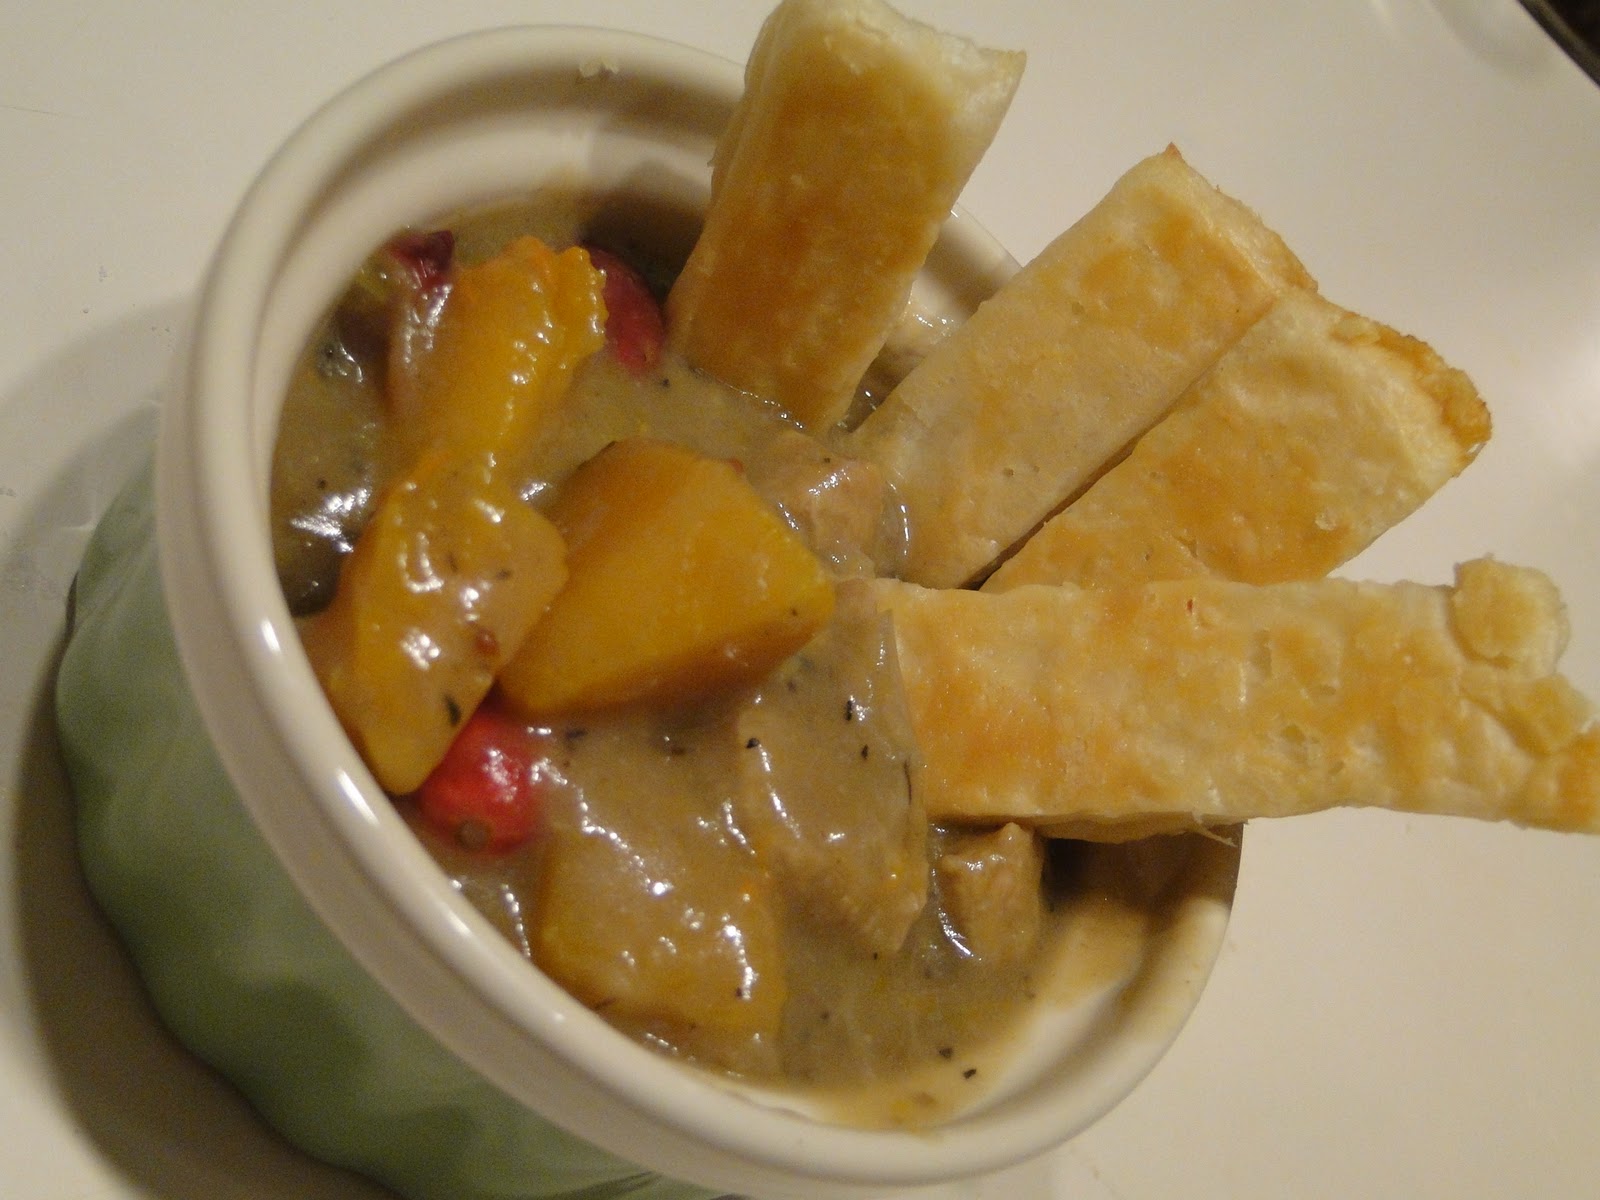
We had yet another incredible New Year's Eve feast. Several years ago a friend of mine invited us to be part of a 4 course wine pairing dinner. Back then Fred and I were still eating meat. As a matter of fact it was at one of these dinners that we had or very last meal with meat.

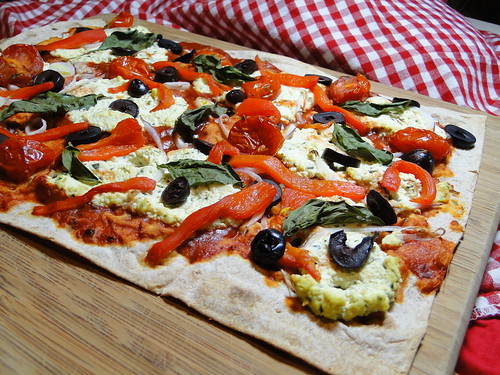
We loved the tradition so much, we decided to carry on with a vegan version. We found that a few of our friends were up for joining us in the vegan version, which just thrilled me! This year my good friends Beth and Jerry were our fantastic hosts. I love these two for many reasons. One of those reasons is that they love to create in the kitchen as much as I do. It makes our dinner party celebrations even more awesome. This year they decided on an Italian themed dinner.

The next couple of days I will be posting about our adventures course by course. I am going to do it in reverse for no other reason than I took a long time to write up my dessert recipe in my wine induced day after fog.

I must start off by saying, desserts and pastries are still my Archilles heal. It is always a challenge for me to come up with something worth serving to others on my own, at least without  having to try and try again. My original plan was to make white chocolate mousse stuffed cannolis using the white chocolate mousse recipe from The Artful Vegan. The mousse was an epic fail. It was completely liquid after sitting in the fridge all night. It was a really sad and expensive fail. But the show must go on.

To keep with the Italian theme I then thought that something with "marscapone" would be a good idea. I didn't want to do tiramisu, because I felt that would be too obvious. So I started playing around with the marscapone idea first. I had some egg nog in the fridge that I had bought for Christmas and never used and the Egg Nog Marcapone Cream was born.

We had a white elephant exchange a couple of night ago and I walked away with some yummy fig balsamic vinegar from Queen Creek Olive Mill. As soon as I got this I knew I had to use it somehow for this dinner.


After the syrup was made, I was having a hard time deciding on the poaching liquid. I wanted to make sure there weren't too many opposing flavors going on. I ran to our local AJ's food market and talked to Chris their wine and spirits expert. He immediately took me to where there was a lovely pear liquor. It was pricey, but I had to have it. I was toying with the idea of using a sweet marsala, which I think would work well here for a lot less dinero. The reason I steered away from that this time was the wine Fred had chosen for the original pairing: a lovely Pirovano Extra Dry Prosecco. The wine expert at Whole Foods said this one is vegan.

While this was not easy on the wallet, it was very lovely on the plate and the palette. We were about 5 bottles in by this time so I must apologize that I didn't get a super close up. I chose to cut the puff pastry into a square for the bottom layer and a fun star for the top.

Happy 2012 my friends! May it be a prosperous, joyful and delicious year for you!


Poached Pear Napoleon with Eggnog Marscapone Cream and Fig Balsamic Drizzle

Makes 6 Serving

There are several components to this dish and it may look a bit overwhelming. None are too complicated and several can be done in advance. I recommend making the marcapone cream, toasted walnuts and the balsamic syrup a day ahead of time to make assembly a snap.

Eggnog Marscapone Cream

1/2 cup tofutti cream cheese
1/2 cup tofutti sour cream
1/2 cup Earth Balance Egg Nog
1/3 cup sugar
1 teaspoon vanilla

Poached Pears

4 ripe but firm anjou pears (peeled, cored and halved)
1 bottle Mathilde Poire Liqueur, (or other pear liqueur) 3 tablespoons separated out
1 whole vanilla bean scrapped
1/2 teaspoon ground cinnamon
1/8 teaspoon nutmeg
2 tablespoons light brown sugar

Fig Balsamic Syrup

1 bottle Queen Creek Fig Balsamic Vinegar
1/4 cup agave nectar
2 tablespoons sugar

Toasted Walnuts

1/4 cup walnuts, coarsely chopped
1/4 teaspoon cinnamon
1 teaspoon sugar
touch of salt
2 teaspoons canola oil

1 package frozen puff pastry, thawed

For the Eggnog Marscapone Cream:

In medium sized bowl combine the cream cheese through vanilla. Refrigerate for at least an hour. Combine until mixture is fairly smooth. This can be made a day ahead of time and refrigerated in a sealed container. If mixture is too loose add a bit more cream cheese. If it is too thick add a bit more eggnog.

For the poached pears:

In a small bowl whisk together 3 tablespoons pear liqueur, vanilla beans, cinnamon and nutmeg until sugar is dissolved. In a large saute pan (large enough to hold all of the pears in one layer) over medium-low heat stir remaining liqueur with sugar mixtures. Place pears cut side down in pan. Cover and poach for 30-40 minutes (depending on the ripeness of the pears) turning 1/2 way through. Let pears cool enough to handle them and slice to about 1/4" thick. Then let them cool to room temperature.

For the Fig Balsamic Syrup:

While the pears are poaching, combine syrup ingredients in small saucepan. Simmer over medium low heat until the liquid is reduced by 1/2, about 20 minutes. Be careful not to let it boil or you will have a sticky icky mess. When the pears are through poaching. Add 1/2 cup of the poaching liquid to the syrup and stir to combine. Let the syrup and the pears cool to room temperature.

Carefully lay out the puff pastry sheet(s). Using your choice shape of cookie or biscuit cutter (approx 3" size) cut out 12 pieces of puff pastry. Place on ungreased cookie sheet about 1 inch apart. Bake according to package directions (usually 10-12 minutes in a 400 degree oven). Let cool to room temperature.

For the toasted walnuts:

In an 8 x 8 baking dish (or similar size) combine walnuts through oil until evenly coated. Bake in a 350 degree oven for about 4-5 minutes, until lightly toasted. Let cool to room temperature. Can be made ahead of time and stored in an airtight container for 1-2 weeks.

To assemble:

Place about 1 tablespoon marscapone cream on middle of serving plate. Place one piece of cooked puff pastry on top. Next add about 6-8 slices of the poached pears another tablespoon or two of marscapone cream (this stuff is like crack so use as much as you want within reason). Place a second puff pastry piece next. Dollop with a little more marscapone cream. Drizzle decoratively with syrup and garnish with cinnamon toasted walnuts.

Listen to the oooohs and aaaahs of your guests.

Sunday, December 25, 2011

Merry Christmas Dinner

Sheesh! Blogging has really gotten away from me. I miss the days I had lots of time to play on the internet. The kitchen has been rocking busy the last couple of weeks. Sadly, I have been very bad about taking pictures. Today I did manage to get the camera out after making dinner.


Fred has had a hankering for mashed potatoes and gravy. This was a request I was more than happy to fill. 'Taters and gravy are one of those holiday (and non-holiday for that matter) comfort foods that make me soooooo happy. We needed something green after all the holiday cookies, so we had simple steamed broccoli with a little spike seasoning. To round out the meal I had some seitan in the fridge that was a bit funky in the texture department. It was too chewy sauteed, so I decided to make it chicken fried. Now I didn't really measure, but it went something like this:

Chicken Fried Seitan Nuggets

2 seitan cutlets cut into nuggets

3/4 cup panko bread crumbs
3 tablespoons all purpose flour
1 tablespoon nutritional yeast
1 teaspoon baking powder
1 teaspoon garlic powder
1/4 teaspoon smoked paprika

1/2 cup soy milk
2 tablespoons all purpose flour
2 teaspoon dijon mustard

1 1/2 cups oil for frying in a 10 inch skillet

Preheat oil to 350 (when flour sizzles in oil).

In one shallow bowl mix panko through paprika. In a second shallow bowl combine soy milk through dijon mustard. Place seitan nuggets in soy milk mixture and soak for about 1 minute. Dredge in panko mixture and carefully place in oil. Make sure not to crowd pan (it will take 2-3 batches). Fry for about 3 minutes then flip over and fry other side for about 3 more minutes or until golden brown. Remove from pan on put on paper towel lined plate. Serve with mashed potatoes and gravy or with your favorite dipping sauce.

I hope you all had a love and joy filled Christmas Day!

Friday, November 18, 2011

The return of FNF! - Paula Dean's Turkey Pot Pie


It's been a couple of months but we are back at it. It is the return of Food Network Friday's hosted by Tami of Vegan Appetite. Make sure to visit her blog to see how the other participants created their dishes for the challenge.

This time we are taking on Paula Dean by veganizing her recipe for Turkey Pot Pie. She loves to poo poo tofu and thinks nothing can be made without full cream butter, heavy cream and fatty meat. Despite these shortcomings, I do enjoy watching her. She has a very sunny personality. Her anti-vegetarian bent made this week's conversion even more fun.

My original plan was to not only veganize the butter queen's recipe, but to make a healthy version. I was super motivated to also make it a hand pie. While my intentions were good, once I got cooking I ended up abandoning both of my ideas. I found a box of vegan creamy portobello soup, so instead of taking the lighter road, I ripped open the box and forged on! The hand pies were still on the agenda...until my puff pastry decided to be uncooperative. So what the heck, I cut the pastry into strips and carried on.

I thought the proportion of cranberries was too much, so I reduced them to 1 cup. I used TVP chunks re-hydrated in water with Bill's Chiknish Seasoning. I had to play around with my puff pastry. I decided to serve this as a deconstructed pie. The filling was placed in small ramekins and garnished with puff pastry strips. Alternately you could make the lattices like she does in her dish, but I almost think that might make it too heavy. The cranberries provided the perfect hint of tart to mellow out the richness of the rest of the filling. I served it straight up. It was so rich, I knew I wouldn't be able to eat anything else with it. Look how pretty it is! Wouldn't it be lovely on your Thanksgiving table?

The verdict is in. I took samples of this too work for my anything but vegetarian co-workers. They were amazed at how "meaty" and really delicious this was. One guy even had seconds! I say that's another win for vegananizing another FN recipe!!!


Deconstructed Thanksgiving Pot Pie

2 cups water
2 teaspoons Bill's Best Chik'nish Seasoning
1 1/2 cups TVP chunks
3 tablespoons olive oil
2 stalks celery, diced small
1 medium onion, diced small
6 oz white or cremini mushrooms, sliced thinly
1 teaspoon dried thyme
1/2 teaspoon rubbed sage
1/2 teaspoon black pepper
1/2 teaspoon salt
2 tablespoons flour
2 tablespoons nutritional yeast
1 cup broth (using liquid drained from TVP)
1 - 16 oz container of Imagine Creamy Portobello Mushroom Soup
2 cups butternut squash, cut into 1/2" cubes
1 cup fresh cranberries
1/2 cup soy milk
1 tablespoon arrowroot
1 sheet puff pastry, cut into 1 x 3 inch strips

In a medium saucepan heat water and Bill's Best Chik'nish Seasoning to boiling. Add TVP. Turn off heat and let re-hydrate for 20-25 minutes. Drain and reserve liquid.

Preheat oven to 400 degrees. Place puff pastry strips on un-greased baking sheet, leaving about 1 inch between strips. Bake for 15 minutes until golden brown. Remove from oven and keep warm.

While the TVP is rehydrating in a large saucepan (or small stock pot) over medium heat add olive oil, onions and celery. Saute until just soft, about 5-7 minutes. Add mushrooms, thyme, sage, pepper and salt. Saute until mushrooms start to release their liquid, about 3 more minutes. Stir in flour and nutritional yeast, stirring to incorporate. Saute for about 2 minutes. Whisk in broth and simmer until mixture starts to thicken, about 5 minutes. Whisk in creamy portobello mushroom soup, butternut squash and rehydrated TVP. Simmer for about 20-30 minutes until squash is tender. Add cranberries and simmer for about 5 more minutes. Whisk arrowroot powder into cold soy milk until dissolved. Whisk arrowroot mixture into squash mixture. Simmer until mixture thickens. Ladle stew into 1 cup ramekins and garnish with 4-5 strips of puff pastry. 

Tuesday, October 25, 2011

MOFO - Day 25 - Cannellini Beans

Today we are going to talk about another bean I've grown to love, the Cannellini Bean. As you might be able to tell by its name, it is a very popular bean in Italy. They are found in traditional Minestrone and lots of other Tuscan dishes.

I ususally buy mine canned, but they are more commonly purchased dry. Like most dried bean they do best if you soak them overnight before cooking. One thing I learned about the dried beans is that is is very important that they are boiled for at least 10 minutes to remove those pesky substances that can cause, well some down-right unlady like issues. Stove top cooking requires about 1-2 hours of simmering time before they will be soft. If you make your beans in the slow cooker like I do, you are going to want to make sure that you boil these for 10 minutes before putting them in to the slow cooker or your belly with not be happy.

Here are some nutritional facts from the fine folks at Eden Foods:

One 1/2 cup serving of Cannellini beans provides 5 grams of fiber, 6 grams of protein, 10% of the RDA of Iron and a whopping 45% of the RDA of Thiamin (B1). You also get a nice little boost of zinc (10% RDA) and calcium (4% RDA). But frankly, to me, they just taste good. I love them because they are bigger than most other white beans, so they have a toothsome bite to them. They are great to toss into a big salad with a tasty vinegarette. They are dreamy in pastas and casseroles. One of my favorite way to get my Cannellinis is soup! It is still 95 degrees here, but as fall approaches, I often long for a nice cozy bowl of soup. This soup also has some yummy kale, which surprisingly has 2 grams of protein per 1 cup serving. Kale is another nutritional powerhouse. This same 1 cup serving boasts 206% of the RDA of vitamin A and 134% of the RDA of vitamin C! Holy anti-oxidants batman! So eat your soup and keep those nasty colds away and get some protein while you are at it.


Cannellini Bean and Kale Soup

Makes 6 servings

1 tablespoon olive oil
2 stalks celery, cut on an angle about 1/8 inch wide,( approx 1 cup)
2 med carrots, peeled and thinly sliced, (approx 1 cup)
2 medium leeks, white part only, cleaned and thinly sliced (approx 2 cups)
1 tablespoon chopped fresh thyme
1 tablespoon dried parsley (or ¼ cup fresh chopped)
½ teaspoon Herbs de Province
½ teaspoon poultry seasoning
¼ teaspoon white pepper
¼ cup dry white wine
1 – 15 oz. can Cannellini beans with liquid
6 cups broth
1 bay leaf
1 bunch kale vein removed, torn into bite sized pieces

In a heavy bottomed stock pot heat olive oil over medium heat. Add leeks and sauté until they start to sweat, about 4-5 minutes. Add carrots and celery and sauté until they just start to soften, about 5-7 minutes. Add thyme, parsley, Herbs de Province and white pepper. Sauté for about two more minutes, until herbs become fragrant. Add white wine to deglaze. Simmer for about 3 more minutes until liquid is almost evaporated. Add vegetable broth and bay leaf. Reduce heat to med low to simmer. Simmer for about 20 minutes. After 20 minutes, stir in kale. Let simmer for 5-10 minutes or until kale has softened but is still bright green. Ladle into bowls and serve.

Monday, October 24, 2011

MOFO - Day 23 - Adzuki or Aduki Beans

Adzuki beans are a fun little red bean commonly used (after fermentation) to make a sweet red bean paste that is used in pastries in same parts of East Asia. They are believed to have originated somewhere in the Himalayas. They come canned or dried. I am a huge fan of canned beans. They are super easy to keep in the pantry and quick to whip up in a pinch. Dried beans are awesome, but require a bit more planning. I buy almost exclusively Eden Organic brand canned beans. Their beans are consistently high quality and organic. They are one of the few brands that use cans that are not lined with BPA, which has been linked to breast cancer. (For those of you who might not know, I am an 11 year survivor so I am always on the lookout for companies who voluntarily eliminate suspected carcinogens from their products).


Adzuki Beans have 7g of protein per half cup serving and absolutely no fat! Oh did I mention they have 5 grams of fiber too? Add to the list a nice dose of iron, some calcium, B vitamins and trace minerals to make this a really nutritional little bean. It is worth mentioning that you can get zero fiber from meat, poultry or fish.

I look forward to trying some sweet dishes with this yummy little bean, but this fine day I opted for a nice spicy Asian Slaw.


Spicy Adzuki Savoy Slaw

1 small head savoy cabbage, shredded
1 small head red Belgian endive or radicchio, shredded
3 green onions, separated
1 - 15 oz can Adzuki beans, rinsed and drained

1/4 cup plus 2 tablespoons vegan mayonnaise
2 tablespoons brown rice vinegar
1 tablespoon minced ginger
1 clove garlic, minced
2 teaspoons sesame oil
2 teaspoons brown rice syrup
1 teaspoon sriracha sauce

Garnish each serving with black sesame seeds

In a large bowl, toss cabbage through beans. Separate green part of green onion from light green and white part. On an angle, thinly slice green part of green onion. Toss the sliced green onions in with cabbage mixture reserving the other part for the dressing.

In a small food processor or blender combine mayonnaise through five spice powder, adding roughly chopped white and light green part of green onions. Combine until smooth. Stir dressing into cabbage mixture.

Enjoy and come back tomorrow when we will be meeting the Cannelli Bean!

Saturday, October 22, 2011

MOFO - Day 22 - Roasted Asparagus and Porcini Risotto with Pine Nuts

To wind up That's Just Nuts (and Seeds) Week I'm being a nut repeater, but I think this is worth it. Today's recipe has a bit o' the pine nut in it. Risotto is not difficult to make, but it does require patience. It is super important to keep stirring while it is cooking. This helps release the starches and coax the creamines from the grains. It is also very important that once the rice is added, all ingrdients that are added are warm or even hot so that the rice does not stop cooking. If it stops cooking during the process, you will end up with crunchy and not so creamy grains.

Once you have had a well made risotto, you will be hooked. 1 cup of cooked arborio rice (the kind you should have for a true risotto) has 4.4g of protein. Add the 1 tablespoon of  pine nuts and add another 1.2 grams of protein. This recipe has a beautiful flavor profile. The earthy mushrooms combined with a hint of rosemary in the broth dance withe the garlic roasted asparagus and fresh oregano and thyme to give your tastebuds a subtle comfort food treat. The pine nuts add just the right amount of nutty crunch. Their creaminess is a great complement to the creamy risotto.


Roasted Asparagus and Porcini Risotto with Pine Nuts


Makes 8 Servings

1 cup dried porcini mushroom
1 1/4 cup boiling water
6 cups vegetable or mushroom broth
1 sprig fresh rosemary

½ pound asparagus, cut into ¼-1/2 inch pieces (approx 2 cups)
2 cloves garlic minced
1 tablespoon olive oil
salt and pepper to taste

1 tablespoon olive oil
1 medium yellow onion, finely diced (approx 1 ¼ cup)
1 tablespoon chopped fresh oregano
1 teaspoon fresh ground black pepper
½ teaspoon salt
1 teaspoon dried thyme or 1 tablespoon chopped fresh thyme

½ cup dry white wine, warmed
2 cups Arborio rice
½ cup toasted pine nuts

Preheat oven to 350.

In a small glass bowl, pour boiling water over dried mushrooms and set aside to soften for at least 20 minutes.

In a large saucepan add vegetable/mushroom broth and rosemary. Heat until just about boiling and turn down to the lowest setting your stove has.

In a 8 x 8 roasting pan toss asparagus, garlic olive oil, salt and pepper. Roast in oven for about 15 minutes until al dente. Turn off heat and keep warm. In the mean time, drain mushrooms reserving liquid and chop mushrooms to about the same size as asparagus. Add 1 cup reserved mushroom liquid to pan with broth. Add mushrooms to pan with asparagus in warm oven. (I actually did this while the risotto was cooking but you must be a good multi-tasker).

In a small stock pot or very large sauce pan over medium heat, add the onions, oregano, salt and pepper. Sauté until onions are translucent, about 5 minutes, being very careful not to burn. Add Arborio rice and sauté until the rice is just barely starting to turn a light tan. Add warmed wine (it is very important that the wine is warm, almost hot, or the rice will stop cooking and will not soften up properly), stirring constantly. When the wine is almost totally absorbed, add about 1 cup of hot broth using a ladle, still constantly stirring. It will take a bit of time for the rice to absorb this first round of broth, but be patient. It is sooooo worth the wait. When the liquid is almost completely absorbed, add the next cup of broth and repeat. Just before adding your last cup of hot broth, stir in the asparagus mushroom mixture. Then add the last cup of broth, still stirring constantly, until the liquid is mostly absorbed. You want a bit of liquid left so that it has a beautiful creamy texture.

To serve, spoon into a wide but shallow bowl. Garnish with 1 tablespoon toasted pine nuts and one fresh rosemary sprig for each serving. Serve immediately.

And now...the winner of the Chicago Diner Cook Book is....#8 Em!!!! She says she'd opt for a classic burger and fries if she were at the diner! Can't go wrong there. Em, please contact me with your mailing address so I can get your copy of Chicago Diner on its way!!! Congrats!!!!

Friday, October 14, 2011

MOFO - Day 14 - AVK Seiatan

Every once in a while you run accross a recipe that is just perfect for what you need. This savory seitan is the perfect recipe for making recipes that need a good toothesome cutlet. I love to use this recipe for things like chicken fried seitan (shown below with jalapeno gravy), seitan parmesan and one of my favorite conversions, Seitan Oscar.You can also cut thiem into smaller pieces. They make fantastic chicken fingers or faux wingz. Get creative! These cutlets will make you happy.


Savory Seitan

2 1/2 cups vital wheat gluten
1/4 cup nutritional yeast
1/4 cup soy flour
1/4 cup soy sauce
2 tablespoons ketchup
1 tablespoon olive oil
1 teaspoon browning sauce, optional
1/4 cup red wine, or additional broth
1 1/2 cups plus 4 cups chilled vegetable broth, divided
3 cloves garlic, minced
1 tablespoon canola oil

In a medium bowl, combine the vital wheat gluten, yeast and flour. Set aside.

In a small bowl, combine the soy sauce, ketchup, olive oil, browning sauce, wine, 1 1/4 cup vegetable broth and garlic. Mix well and add to the dry ingredients. Stir together with a wooden spoon, adding the remaining 1/4 cup broth, if needed to make a firm but workable dough. Knead for about 2 minutes, or until a cohesive dough is formed.

Let the dough rest for 15 minutes, then divide it into 10 dough balls. Place a dough ball between two sheets of parchment paper and use a rolling pin to roll it out to 1/4 inch thickness. The cutlet will shrink some during cooking, so make it about 1-inch larger then you want it to be when cooked. Continue with the remaining dough balls, keeping the cutlets separated so they don't stick together.

Preheat oven to 300 F. Heat the canola oil in large skillet over medium heat. Working in batches, add the cutlets in a large roasting pan and cover with the 4 cups of broth. Cover the pan tightly with foil and place in the oven. Bake 1 hour, turning once. Let the cutlets cool in the broth. The seitan is now ready to use or store until needed.

Printed with permission from American Vegan Kitchen (Vegan Heritage Press, 2010). Copyright Tamasin Noyes

There is an option for slow cooker method in the book.I am a huge fan of crock pot seitan recipes. It takes about 10 or 15 minutes to whip up your seitan dough, roll it into one or two roasts, depending on the shape and size you want. Put it in enough cold stock to cover your roasts and let it go on low for 8 hours. I like to add black peppercorns, bay leaves, smashed garlic cloves and a few sprigs of fresh parsley to the stock or broth for a little extra flavor!

Wednesday, October 12, 2011

MOFO - Day 12 - Seitan Invades Your Soup

One thing worth mentioning about steaming seitan is that you don't have to buy a special steamer pot. You can use a pasta pot or regular stock pot with a steamer basket insert. Ikea carries the inserts for only $5.99, but I'm betting you could even find them in some dollar stores. Voila - a very inexpensive and effective steamer!


The steaming method of making seitan is not exclusive to sausage making. Steaming can also be used for roasts or logs. I have been testing for Celene Steen and Tami Noyes' upcoming sandwich book. They have come up with a few pretty ingenius recipes for vegan cold cuts. One such recipe is posted HERE for Gobbler Slices which are, you guesed it, vegan turkey slices! This is a seitan style log that also has beans in it for protein variety. The flavor is so good you might start gobbling yourself.


I screwed up the recipe test for these so mine came out too dry to use as lunch "meat". I didn't want it to go to waste, so I made this warm and wonderful soup. This is perfect for the chilly days that are sure to be around the corner. Serve it with crusty bread for a filling lunch or dinner.


Cream of Broccoli and Turkee Soup

Makes 10 cups

1/4 cup Earth Balance Vegan butter
1 medium onion, diced (approx 1 3/4 cup)
1 stalk celery, small dice
1 teaspoon rosemary, crushed
1/2 teaspoon leaf thyme
1/2 teaspoon white pepper
1 teaspoon salt
dash of nutmeg
3 tablespoons all purpose flour
1 head broccoli, stems diced small, head chopped in florets (approx 5 cups)
6 cups vegetable broth (chicken flavor if you have it)
8 oz. small diced Gobbler Slices, Tofurkey or chicken style seitan (approx. 2 cups)
2 cups soy unsweetened soy creamer

In a large soup pan over medium heat, sauce onions and celery in butter until onion is translucent, about 5 minutes or so. Add rosemary, thyme, white pepper, salt and nutmeg. Saute for about 30 seconds to release the oils from the herbs. Turn heat to very low. Stir in flour. Cook for 5 minutes stirring frequently so that the flour doesn't burn. Add about 1/4 cup of the broth to deglaze, making sure to scrape all of the goodies from the pan. Add remaining broth and chopped broccoli. Turn heat back up to medium. Bring to a simmer and simmer until broccoli is tender, about 10 minutes. Using a stick blender or a regular blender in batches, blend/puree soup. I like to leave it slightly chunky, but this is entirely up to you. Return to pan (if using regular blender). Stir in seitan and soy creamer. Simmer until it is heated through and slightly thicker, 10-15 minutes. Remove from heat and let rest for 10-15 minutes. This will intensify the flavors. Serve with a nice rustic bread.

Wednesday, October 5, 2011

Mofo - Day 5 - Touting Tempeh!

Another fine source of protein made from the mighty soy bean is tempeh. Tempeh is produced by the controlled fermentation of cooked soybeans with a Rhizopus culture also called a tempeh starter. Sound like a science project? Maybe! But the results are delicious and nutritious. The fermentation process produces some great anti-oxidants. The fermented cakes are also a complete protein. Each 4 oz serving has a whopping 20 g of protein! Tempeh has a bit of a nutty flavor and a very interesting firm and chewy texture that lends itself to working in many types of recipes. It is sold in cakes in many stores these days. Again try to find organic non-GMO types. Below is one brand I love.


One important thing I have found with tempeh is that it is truly best if you steam it for 10 minutes before using it in recipes. There are two reasons for this. The first is that it seems to make the tempeh "pores" open up, making it absorb flavors better, but more importantly it can take out some of the slight bitter flavor tempeh can have. Now, there are times when I don't steam it, for instance, when it is marinated for extended periods of time. Even then, I am always tempted because I want that marinade to soak in.

My first experience with tempeh was several years ago. There was a great little tea house in Scottsdale called the Mandala Tea Room (sadly they closed their doors several years ago). They had a TLTA (Tempeh, Lettuce, Tomato and Avocado) Sandwich on the menu. I was still far from veg, but was trying to eat healthier, so a bacon alternative was very intriguing to me. I hate to use a cliche, but it was truly love at first bite!!!

Today I want to share with you my favorite tempeh bacon-ish recipe. It is not going to fool anyone into thinking it is the actual fatty nasty original, but it is awesome in its own rite. This one comes from Joanna Vaught, the illustrious author of Yellow Rose Recipes. This recipe and lots of other awesome recipes are included in her awesome 'zine Potluck Mania!


Maple Ginger Tempeh Strips

by Joanna Vaught

 8 oz. tempeh
1/2 cup soy sauce or tamari
1/4 cup maple syrup
1/4 cup peanut oil
2" knob of ginger, peeled and julienned
2 cloves garlic, smashed and chopped
2 teaspoon balsamic or apple cider vinegar
2 teaspoons liquid smoke
1/4 - 1/2 cup veggie broth

Slice Tempeh into 10-12 - 1/4 inch thick and 8" long strips.

In a long container with a cover whisk together all ingredients except for the tempeh. Gingerly slip tempeh strips into the marinade, being careful not to break them. If the marinade does not completely cover the strips, add a bit more broth.

Marinate for at least 8 hours and up to a week.

When you're ready to cook the strips, heat a nonstick, heavy-bottomed fry pan over medium eat. There is not need to add any oil because of the oil in the marinade. Add as many strips as will fit the pan (or how ever many you need). Allow to fry for 2-3 minutes, until they are dark brown. When they are dark enough, flip the strips.

Whisk the remaining marinade in the container and then, using a teaspoon, drizzle the marinade over the strips, "sealing" the strips. Saute until the second side is dark brown. Serve immediately.

I also love to cut them into cubes and use them as a smoky tempeh crouton on salads. The left over marinade is a good base for a smoky dressing for the very same salad!


I hope you try Joanna's awesome recipe and fall in love like I did!

Tuesday, October 4, 2011

MOFO - Day 4 - More Tofu!

Lets talk more about tofu. Tofu is not tofu is not tofu. Different types of tofu have different uses. Newbie tofu users may find themselves confused of frustrated when they see the different types of tofu in the store. Here is a quickie rule of thumb.


Soft and/or silken tofu is just as it says: soft. It will crumble and fall apart very easily. It is best used for dishes where it can be mixed in uses as a thickener. I use it in the recipe below. It is also excellent for making smoothies, mousse, dressings, sauces...you get the picture. While I have seen silken tofu in the refrigerated section, it is usually found by the Asian section on the shelves of your grocery store. It can be stored in a cool dry place for up to a year. Pictured below is my preferred brand and type. As I mentioned earlier. I always try to buy and use organic, non-GMO tofu.

Also pictured below is my beloved Veganaise. This variety is organic and does have a little soy in it. There is minimal protein in it, but man it tastes like the real deal!


Probably the most common style of tofu seen in the stores is called tub tofu. It comes in a little plastic tub and is soaking in water. This is found in the refrigerated section and must be kept refrigerated. I am a big fan of extra firm for most dishes, but the firm also works great in dishes like tofu scramble or making tofu based cheeses. This type of tofu has many other uses. It is great in stir frys, grilled, sauteed, fried, baked, just about any way you might use meat. 

One important thing to remember about tub tofu is that for many recipes it should be drained and pressed. This is something that I learned the hard way. Pressing the tofu takes out extra moisture that can give the tofu an unpleasant, mushy texture in many recipes. There are several methods to pressing tofu. Being the gadget girl that I am, I bought myself a Tofu X-press, but two plates a bag of beans (or some other heavy food item from your pantry) and a clean kitchen towel will do nicely as well. Place the drained tofu on a towel lined plate. Top with the second plate and put your weight on top. Make sure the weight is not too heavy or it will crush your little block of tofu. Let it press for about an hour and you should be good to go. I often put my tofu in the fridge before I go to work and let it press all day for time-sake.

You may also find brick style tofu. This is similar to tub style, but is not swimming in liquid. It tends to be much more firm and is best in dishes with sauces as it doesn't absorb flavors as readily as the tub style.

Ok, now that you are an expert at the different type of tofu, I'm going to share with you a very tasty and fun way to use silken tofu (and Veganaise). It's not low fat, but it is a tasty and awesome party dish.


Special Spinach Artichoke Dip

Makes 3 1/2 cups

1 - 12.3 oz. package aseptic packaged silken firm tofu (like Nori-mu)
1/4 cup Vegannaise
2 tablespoons nutritional yeast
1 tablespoon capers, dained
2 large cloves minced garlic
1 1/2 teaspoons granulated onion
1 teaspoon smoked paprika
1/2 teaspoon salt
1/4 teaspoon ground black pepper

8 oz frozen chopped spinach, thawed excess water squeezed out
1 - 8.5 oz can artichoke hearts, drained, corsely chopped
1 - jarred roasted red pepper, diced (approx 1/3 - 1/2 cup)
3 tablespoon chopped Kalamata olives
2 tablespoons chopped chives

In a food processor blend tofu through black pepper until smooth, scraping sides occasionally. Transfer to a large bowl. Add spinach and mix until well combined. Add remaining ingredients and gently stir until ingredients are evenly distributed. Adjust salt and pepper to taste. For best flavor, let sit in fridge for at least one hour for flavors to meld. Serve with pita chips, crusty bread and or fresh veggies.