Wednesday, September 5, 2012

Hatch Melt on Marbled Rye

Last night as I worked to bag and freeze my green gold (aka Hatch Chiles), my Food Saver took a dump. Tonight I got home to a brand new Food Saver (thank you Fred). Fred gallantly headed first to  Costco then Bed Bath and Beyond to find a replacement. Not only did he score, but the very nice cashier gave him the 20% discount even though he forgot his coupon. Nice!! We also had a $50 gift card from some of our lovely friends. What could have been a kitchen tragedy actually turned out to be an "up with people" moment.

When I arrived home tonight, I knew I had a bit of a task ahead of me. It was time to bag up those delicious spicy chiles. Before digging in, I felt the urge for a sandwich. Not just any sandwich...no. I had scored some fabulous marbled rye yesterday. I love the stuff. This called for a melt. Not just your average every day melt. That would not do as I surveyed my giant pan of green chiles. This one would have to be a spicy melt. Here is how it went down...

First I thinly sliced some sweet onions. I tossed them into my iron skillet with a touch of oil and some Southwestern spices I had left over from who knows what. I then diced up a hatch chile and sauteed that along with the onions. Then some thin sliced seitan had to go in the pan and saute until just golden. The marble rye slices were sprayed with a bit of oil on one side. One slice went in oil side down. A couple of tablespoons of shredded Daiya went on to the bread. The seitan mixture was placed on top of that. Then I found just a smidge of some leftover sriracha vegannaise was dolloped on the stack. Next the last piece of bread. The melt was cooked until the bread was perfectly crunchy and golden brown. I don't have to tell you...well yes I do. The combination of the succulent filling, the ooey gooey Daiya, the spicy mayo and chiles perfectly complimented by the beautifully grilled bread was sheer joy! I love when bits of this and that turn into a great meal.


Monday, September 3, 2012

Hatch Chile Season is Upon Us

Every year it's the same thing. I get all tingly in the tummy and the tongue. My inner New Mexican comes to life and I anxiously await the coming of the Hatch Chiles like a child waiting for Santa. Well my friends, today was like Christmas morning. The Sprouts Markets in my neighborhood had the REAL Hatch Chiles from New Mexico for only $.69 per pound.

Fred heard a rumor that several of the local grocery stores were selling chiles grown in Mexico as "Hatch" chiles. Well anyone knows New Mexico Hatch chiles are grown from magical seeds in magical soil. The chiles we purchased were confirmed to be US, New Mexico grown. Score. Now for years I have been buying my chiles from a small market that roasted them for me, but sadly charging a rather outrageous price; a price I was more than willing to pay for my precious chiles. This year I bought them fresh. I had planned on roasting them on my grill when I remembered a random conversation I had with a co-worker/friend a while back. I remembered him saying he had a roaster. As luck would have it, he still had it and Fred picked it up from him this morning. What transpired was a fun night of roasting, enjoying a Mexican beer and some pool time. Oh yes, then there was the tacos!

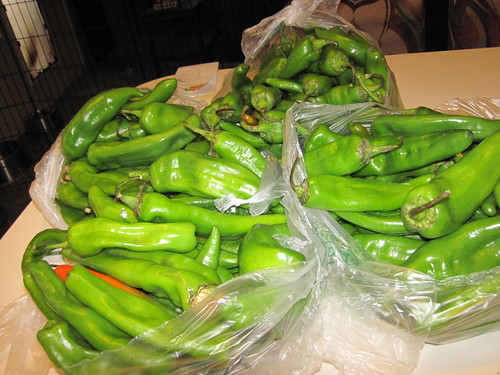
Here they are waiting for me to throw them in the roaster.


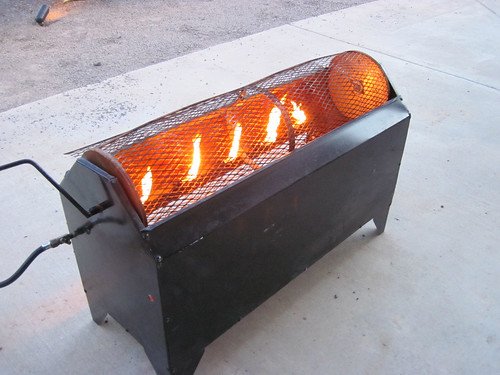
Here is the roaster waiting for the chiles.


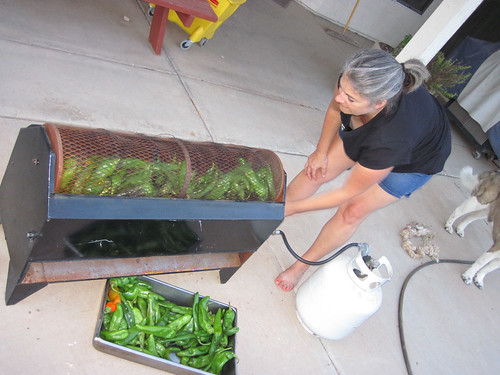
Perfecting my roasting technique. This needs to be an annual event/party!


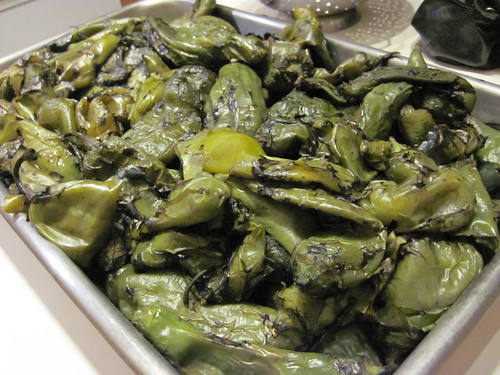
Ready for packaging. We freeze 'em and use them all year long.


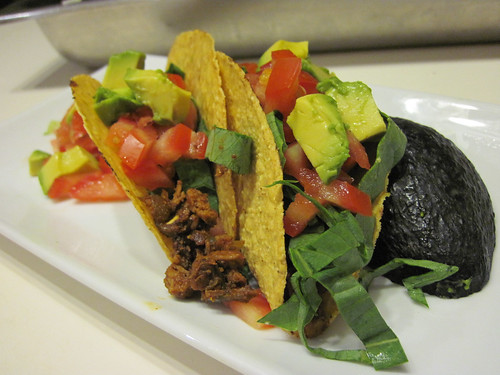
The first thing I decided to do with them? Tacos baby!!


Seitan Hatch Chile Tacos

Makes 8 tacos

Taco filling

1 tablespoon olive oil
1 medium onion, diced small
2 large hot green chiles (preferably Hatch) roasted, peeled and diced (approx 1/3 cup)
8 oz seitan, diced small
1 tablespoon medium chile powder
1 teaspoon smoked paprika
1/2 teaspoon Mexican oregano
1/2 teaspoon chipotle powder
1/2 teaspoon salt
1/4 teaspoon granulated garlic
1/4 teaspoon granulated onion
1 teaspoon agave nectar
1/2 cup water

8 crispy corn taco shells, prepared per package directions
1 cup shredded lettuce
1 large tomato, diced
1 large avocato, diced
Taco sauce or salsa of choice (I use Tapatio hot sauce)

In a 10 inch non-stick or iron skillet, heat oil over medium heat. Add onions and green chiles and saute until onions are soft, about 5 minutes. Add diced seitan and saute until browned, about 3-5 minutes. Add all dried spices and agave nectar. Stir until well combined and saute until just fragrant, about 1 minutes. Add water. Simmer until liquid is gone, about 5-7 minutes. Turn heat off.

While taco filling is cooking, bake taco shells according to package directions. Add about 2-3 tablespoons taco mixture in each taco shell. Top with shredded lettuce, diced tomatoes, diced avocados.   Sprinkle with hot sauce or salsa. You can also dollop some vegan sour cream on top if that's how you roll. 

Sunday, September 2, 2012

Free Cooking Class at Whole Foods 9/15/12

I'm super excited to announce a free cooking class and demonstration at Whole Foods Scottsdale.

This is my first time demonstrating at Whole Foods. They have a beautiful Wolf kitchen that is just waiting for me to whip up some vegan goodness. I'm ridiculously thrilled to have such a great opportunity.

The class will be held at 1pm on Saturday, September 15th. Space is limited to the first 50 people, so please reserve your spot soon. It's free, vegan and delicious, so I suspect it will fill up quickly. To reserve a spot, you can email Lisa at Whole foods sp.sct.marketing@wholefoods.com or you can sign up at the Sub Zero/Wolf Kitchen Counter at 7111 E. Mayo Blvd.

**There is one item missing from the menu. I will be making Sloppy Chipotle Joses as well.


Sunday, August 5, 2012

Book Review - Vegan Sandwiches Save the Day

First of all I must admit, I am a big fan of Tamasin Noyes author of Vegan Appetite blog and American Vegan Kitchen and have had the pleasure of testing for her on more than one occasion. I was excited when I learned it was a collaboration with Celine Steen of Have Cake Will Travel blog and co-author of 500 Vegan Recipes. I've enjoyed quite a few of her yummy recipes in the past. That said, I am also pretty straight forward in my opinions about cook books (even if I am partial to those writing them.).

I have been anticipating the release of Vegan Sandwiches Save the Day for quite some time. I got in on the very end of testing, so only tried a few of the recipes before the book came out. They were all very tasty and enticing, but I wondered if a sandwich book would really excite me as some other books have. When I opened the package I was first impressed with the photos on the cover. We eat with our eyes first. The photos on the cover and inside made my mouth water. Good sign.


Fred is still on his very restrictive diet, so I felt a tad bit guilty making sandwiches with all of their carby bread glory, but I had to do it in the name of research. There is such a great variety of flavors and styles of sandwiches to choose from, that the reader may have a hard time deciding where to start. I had no such problem, because there was one sandwich that I swear was created just for me: The Something Blackened This Way Comes (pg. 118). The name is a cute twist on the book by Ray Bradbury. I loved his books in high school, so I loved the name right off. I love anything blackened, so I knew this had to be the first one I made. 

OK, seriously, I expected this to be very flavorful. I expected to like it. I did not expect it to be the mouthgasm it was! I had frozen some of Tami's seitan cutlets a few weeks ago, so I had them on hand. This made prep a snap. It just hit me! This combo is reminiscent of a chicken sandwich we had at a restaurant I worked at years ago...but vegan and soooooooooooo much better. I loved the heat of the blackening spice and the sriracha spiked mayo. The cool cucumber/green tomato relish was just perfect with the spice and the creamy mayo. Served on a crispy ciabatta roll, it was ridiculously good. It was hard to stop at just one. 


While this is now my current fav, I also highly recommend the Two Tomato Tango (pg. 126) and the lunch box friendly Protein Happy Quinoa Wraps (pg. 74). 

I love the into where Celine and Tamasin make sure to mention that the recipes are just a starting point. they encourage the readers to play and modify to their tastes. For the ambitious there are recipes for home made breads, but options to use pre-made. The one criticism I do have about this book is the type face the publisher chose. For those of us whose eyes are getting "more mature", the type face is just a bit light and can be challenging to read at a distance. It's going to be hard to make my next selection, but the Ban Mi has piqued my interest. If you love hand held meals and fun variations on Americana and beyond, I highly recommend picking up a copy of Vegan Sandwiches Save the Day!

Sunday, July 22, 2012

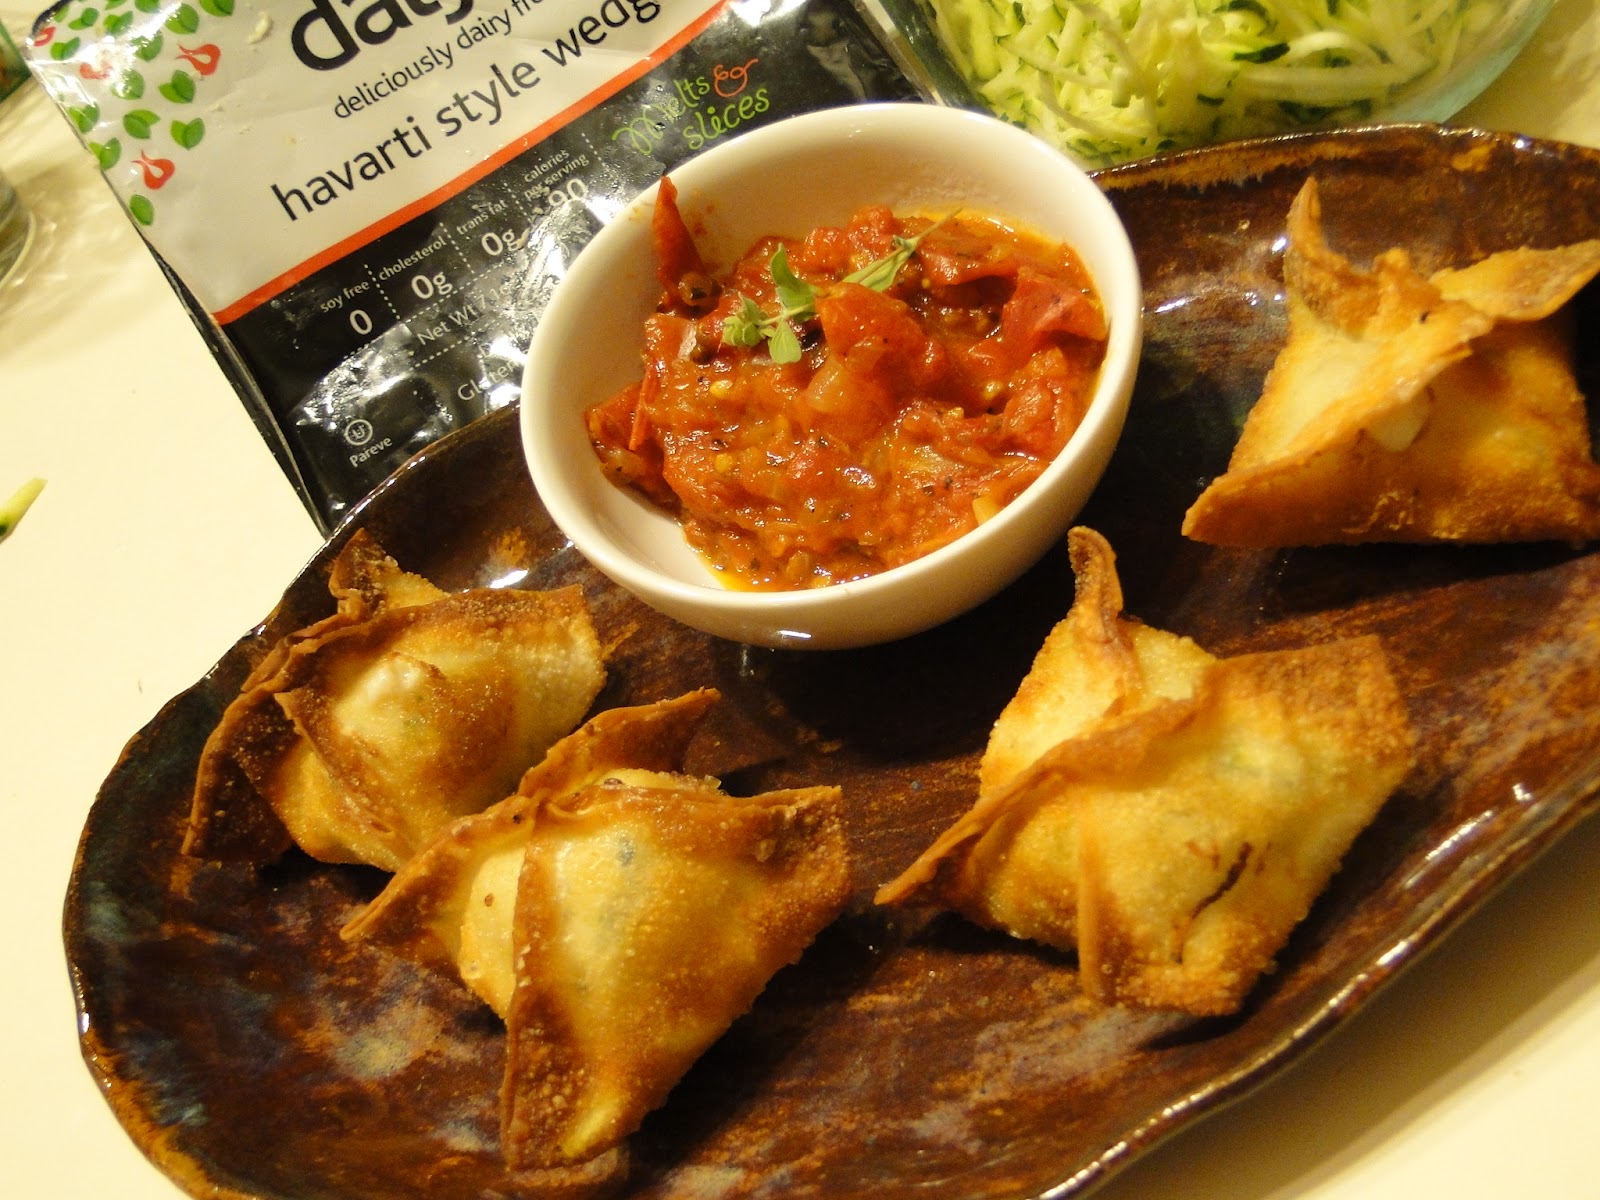
Crispy Zucchini Havarti Purses with a Rustic Roma Tomato Sauce

Once upon a time, I worked at a little family owned joint in Illinois. The owner was this crazy, spastic guy from New York. His cooking skills weren't always the best, but every once in a while, he would come up with some really unique and successful ideas. One of the ideas he came up with was a unique way to make cheese sticks. He took rectangular chunks of mozzarella cheese, wrapped them in full sized wonton wrappers and threw those bad boys in the fryer. They were pretty amazing; creamy and gooey on the inside and super crispy on the outside. That was my inspiration for this creation. I opted to use mini wrappers, just to make myself feel less guilty, plus they are darn cute that way.

I've been hearing and seeing all sorts of yummy things about Daiya Havarti wedges. Happily I was able to find it at Whole Foods, Sprouts and Green New American Vegetarian. Admittedly, I'm not the biggest user of the faux cheeses, but have been pretty pleased in the past with Daiya's products in some of my dishes. I'm going to tell you right off, this might be my favorite flavor from Daiya Foods yet. I love the super creamy texture. The jalapenos give just a hint of zing that makes your mouth go, hmmmm dats good. It really melts well too! It's a little bit salty, so keep that in mind when you create your own dishes. You won't need to add much salt to them.


Below is the very simple recipe for these tasty little morsels with a complete pictorial below the recipe.

Crispy Zucchini Havarti Purses with a Rustic Roma Tomato Sauce

Makes 25 purses

25 mini wonton wrappers
1 cup shredded zucchini, un-peeled
1/2 wedge of Daiya Jalapeno Garlic Havarti
water for sealing purses
1 quart canola oil for frying
1 recipe Rustic Roma Tomato Sauce (recipe below)

Heat oil in 10 inch iron skillet or stainless steel pan (do not us a non-stick pan) to 350 degrees. Make sure oil is up to the proper temperature before adding purses.

Dampen a kitchen towel to cover the wonton wrappers with while you are preparing. This will prevent them from drying out. Working quickly with 5 wrappers at a time. Lay the wrappers out on your work surface. Place 1 1/2 - 2 teaspoons shredded zucchini in the center of each wonton wrapper. Then place 1/2 teaspoon havarti on top.

Put a bit of water in a small bowl. Using your finger, slightly wet all sides of the wonton wrapper.


Take two opposite corners and press them together. 

Take the two remaining corners and fold them into the center.


Gently pinch the straight edges together to complete forming the purses.


Here is what they should look like before they go for a swim in the oil.


Gently place the purses flat side down in the oil without crowding the pan. I recommend cooking only 5 at a time for that perfect golden color and crunchy texture. Fry for 2-3 minutes until the bottom sides are golden brown. Gently and carefully turn the purses over and cook for 2-3 more minutes until the other side is golden brown. Drain on paper towels. 


These are molten hot when they come out of the oil, so wait at least 5 minutes before eating them or you will think I am evil! Serve with warm Rustic Roma Tomato Sauce (recipe below).
While gardens in many parts of the country are producing beautiful and plentiful harvests, our gardens here in AZ struggle with the intense heat. Our garden has all but pooped out. We have a few leeks and tiny jalapenos and that is about it. However, some of my friends are having better luck. Once again, my friend Scott brought me some goodies from his garden. This time he brought more zucchini and some awesome Roma tomatoes. The Romas were ripening very quickly. They were a bit too soft to eat straight up or even in a salad, so I decided to make a simple yet tasty rustic tomato sauce.

Check out those pretty tomatoes.


Rustic Roma Tomato Sauce

Makes 2 1/2 cups

2 teaspoons extra virgin olive oil
2 cloves garlic minced
1 small red onion, diced small (about 1/2 scant cup)
2 teaspoons dried oregano
1 teaspoon dried basil
1/2 teaspoon salt
1/4 teaspoon black pepper
1 tablespoon dry red wine
2 pounds organic Roma tomatoes cut lengthwise into 6 wedges
1/4 cup vegetable stock

In a medium saucepan over medium heat, saute garlic and onions until onions are just starting to soften, about 5 minutes. Add oregano, basil, salt and black pepper. Saute for about 1 minute until herbs get fragrant. Add red wine and saute until liquid is absorbed, about 2 minutes. Add tomatoes and vegetable stock. Reduce heat to low and simmer for one hour. Sauce can be served immediately, but it is even better reheated! 

I couldn't help myself, I had to pay homage to Beady-eyed Bob, the crazy New Yorker. After we pigged out on the purses, I made a couple of mini cheeze sticks using just the Daiya. I rolled them egg roll style. Oh crazy rich awesomeness. I'm in love. Check out the melty awesomeness.


Saturday, July 7, 2012

National Heat Wave = NO OVEN!

I know that many parts of the country are experiencing a crazy heat wave this week. Arizonans are more used to it than others, but still. It might be a dry heat, but 113 is flipping HOT no matter how you slice it. This time of the year I don't like to add even one bit of heat to the house, but we do have to eat.

Fred and I are both trying to shed many unwanted pounds that have been hanging around for the past couple of years. His eating plan is pretty restrictive (that's an understatement) and not vegan friendly. I am doing my very best to support his efforts by shopping and making the veggie portion of his stuff. We've been eating lots of yummy tender asparagus, green beans, salads, etc. It is not super exciting stuff and certainly not blog material as it is a lot of the same stuff. This is why I have been again neglecting the poor blog.

Yesterday my good friend Scott mentioned that he had a crazy amount of zucchini he needed to find a home for. So today we met him for some coffee and great conversation. He not only brought some fantastic zucchini, he also brought some succulent roma tomatoes, yummy carrots, banana peppers and a leek. I have some plans for the zucchini, some of which will not fit into our diet plan. I'm going to (oh the horror) turn on the oven and bake some zucchini bread while Fred is out of the house.

Today I took advantage of Scott's tomatoes and carrots. I stopped at Whole Foods to pick up some organic kale. Man was I psyched to find big, beautiful bunches of green kale on sale for only $1.50. I had some Trader Joe's savory tofu in my fridge and some sweet onions from my garden. Armed with all kinds of yummy COLD ingredients, I went about whipping up a perfect summer lunch. This simple, quick, easy, filling and delicious salad is perfect for eating healthy on the fly and keeping the kitchen cool.


Massaged Kale Salad with Baked Savory Tofu


Makes 2 Big Salads

1 large bunch green kale, about 8 cups, washed and torn into bite sized pieces
1 tablespoon extra virgin olive oil
1 tablespoon white wine vinegar (can sub your favorite vinegar)
4 roma tomatoes, diced
1 large or 2 small carrots, sliced thin
1/2 small sweet white onion, thinly sliced
1-7 oz. package Trader Joe's Organic Baked Tofu (Savory Flavor)...feel free to sub any pre-cooked flavored tofu, diced
1/4 teaspoon garlic salt
fresh ground black pepper to taste

Place kale into a large non-reactive bowl. Toss with olive oil and vinegar. Gently massage mixture until the kale get slightly softened. Toss in tomatoes, sliced carrots, white onion and tofu. Sprinkle with garlic salt. Pepper to taste. Toss and serve immediately.

Wednesday, June 20, 2012

Beluga Lentil Bruschetta

Today is the official first day of summer. In the Phoenix area we start summer much earlier. It has been super hot here for weeks now. This time of the year the oven is avoided at all costs. I love cold foods from June to September, I swear. 

The other day, Fred mentioned that the pantry overfloweth. He thought I should think about using some of the dried treasures on the shelves. Quite some time ago I bought some Beluga lentils for a recipe. I only used half the bag, so there they were. Cute tiny little protein packed lentils. They are sometimes called vegan caviar. They cook up very quickly and are very mildly flavored. They stay pretty firm, which makes them perfect for cold dishes.

The garden is starting to struggle in the 110+ degree weather. Luckily we had one last gasp of yellow pear tomatoes and a giant zucchini, which I happily diced up for this yummy take on bruschetta. 


Beluga Lentil Bruschetta

Makes 12-20 pieces depending on the size of bread.

1/2 cup Beluga lentils, rinsed
1 1/4 cup water
1/3 cup yellow tomatoes, diced
1/2 cup grilled zucchini, diced small
1/2 cup roasted peppers, diced small
1 tablespoon fresh oregano, minced
1 tablespoon fresh basil, minced
1 teaspoon capers, roughly chopped
2 tablespoon sweet onions, minced
1/4 teaspoon black pepper
1/4 teaspoon salt
1 tablespoon lemon juice
2 tablespoons roughly chopped fresh parsley

Note: all herbs are measured after mincing/chopping.

In a non reactive bowl, mix all ingredients. Let marinate for at least 4 hours, preferably overnight. 

French baguette approx 1/2 inch slices. 
Olive oil to brush bread slices.
Lightly brush both sides of each slice of bread. Place in one layer on a cookie sheet. Either bake in a 350 oven or on the grill for about 4 minutes per side until bread is nicely browned.

Using a spoon top each slice of bread with lentil mixture. Serve immediately.

The lentil mixture also makes a great salad all on its own if you are trying to cut out the carbs. It's gluten free too!!!